Overview
| Duration | 35 minutes |
| Level | Intermediate |
| Prerequisites | Lab 02, Lab 03, Lab 04, or Lab 05 (at least one) |
Learning Objectives
By the end of this lab, you will be able to:
- Explain how ADO Advanced Security (GHAzDO) ingests SARIF results
- Enable Advanced Security at project and repository level
- Create an ADO YAML pipeline with
AdvancedSecurity-Publish@1 - View and triage findings in the ADO Advanced Security Overview
- Compare GitHub Security Tab with ADO Advanced Security
Exercises
Exercise 6.1: Review SARIF Output
You will review the SARIF v2.1.0 format that all four scanner tools produce.
[!NOTE] This exercise shares foundations with Lab 06 (GitHub variant). Complete Lab 06 Exercise 6.1 if you haven’t already. The following is a brief recap for the ADO track.
-
Open any SARIF file you generated in a previous lab (for example,
reports/psrule-001.sariforreports/custodian.sarif). -
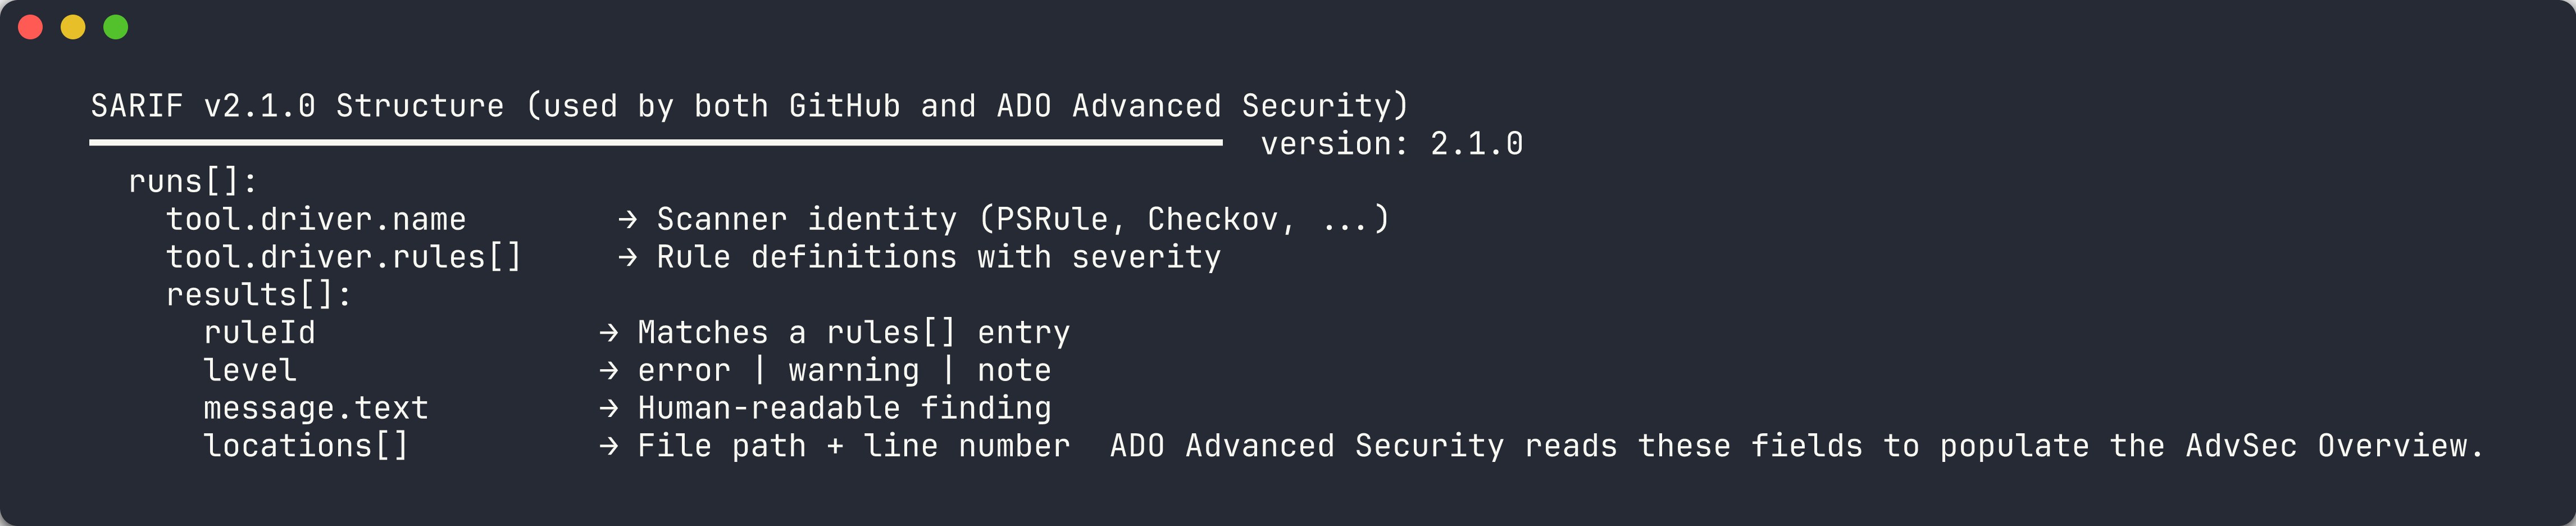
Recall the four main SARIF sections:
Section Purpose version/$schemaDeclares SARIF v2.1.0 compliance runs[].tool.driverIdentifies the scanner tool, version, and rule definitions runs[].tool.driver.rules[]Defines rule IDs, descriptions, severity, and help URLs runs[].results[]Contains individual findings with rule ID, severity, message, and location -
Note how
physicalLocationties a finding to a specific file and line number. ADO Advanced Security uses this location data to surface findings in the security overview and link them to source files. -
Verify that your SARIF file includes at least one result with a
ruleId,level,message, andlocationsarray. ADO Advanced Security requires these fields to display alerts correctly.
[!TIP] SARIF (Static Analysis Results Interchange Format) is an OASIS standard. Both GitHub and Azure DevOps Advanced Security consume SARIF files, so producing SARIF from all 4 tools gives you a unified view regardless of which platform you use.
Exercise 6.2: Enable ADO Advanced Security
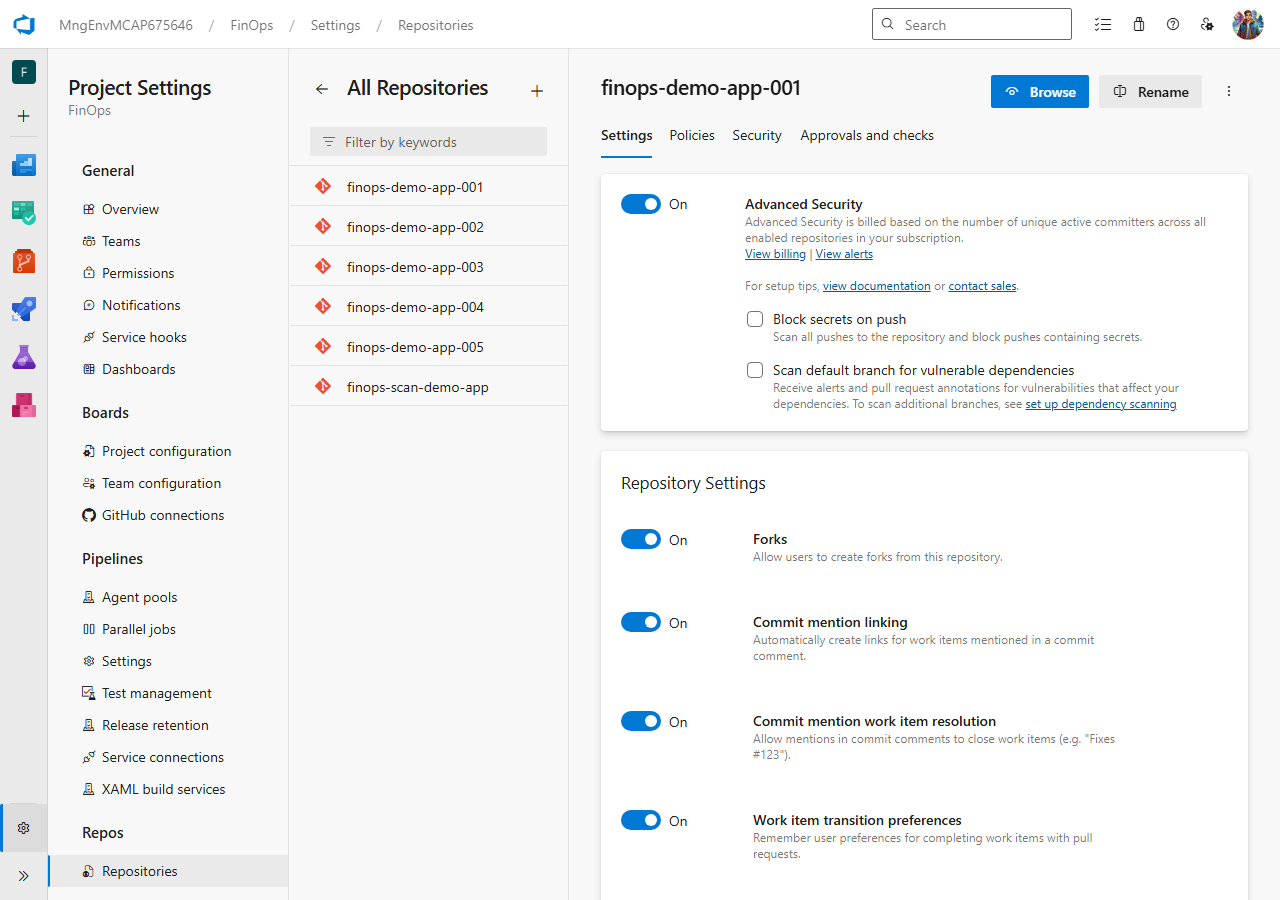
You will enable Advanced Security (GHAzDO) in the MngEnvMCAP675646/FinOps project.
[!IMPORTANT] ADO Advanced Security requires appropriate licensing. Your organization must have GitHub Advanced Security for Azure DevOps (GHAzDO) enabled. Contact your organization administrator if the toggle is not available.
-
Open Azure DevOps and navigate to the
MngEnvMCAP675646organization. -
Select the FinOps project.
-
Click Project Settings (bottom-left gear icon).
-
Under Repos, click Repositories.
-
Select the repository where you want to enable Advanced Security (for example,
finops-demo-app-001). -
Click the Settings tab for the repository.
-
Scroll to the Advanced Security section and toggle it On.
- Repeat for each repository that should report SARIF findings. You can also enable it at the project level to cover all repositories:
- Go back to Project Settings → Repos → Repositories
- Click Settings at the project level
- Toggle Advanced Security to On for all repos
- Verify the toggle is active. You should see a confirmation message that Advanced Security is enabled.
[!NOTE] Enabling Advanced Security at the project level automatically enables it for all current and future repositories in the project. Per-repo settings override the project default if you need to exclude specific repos.
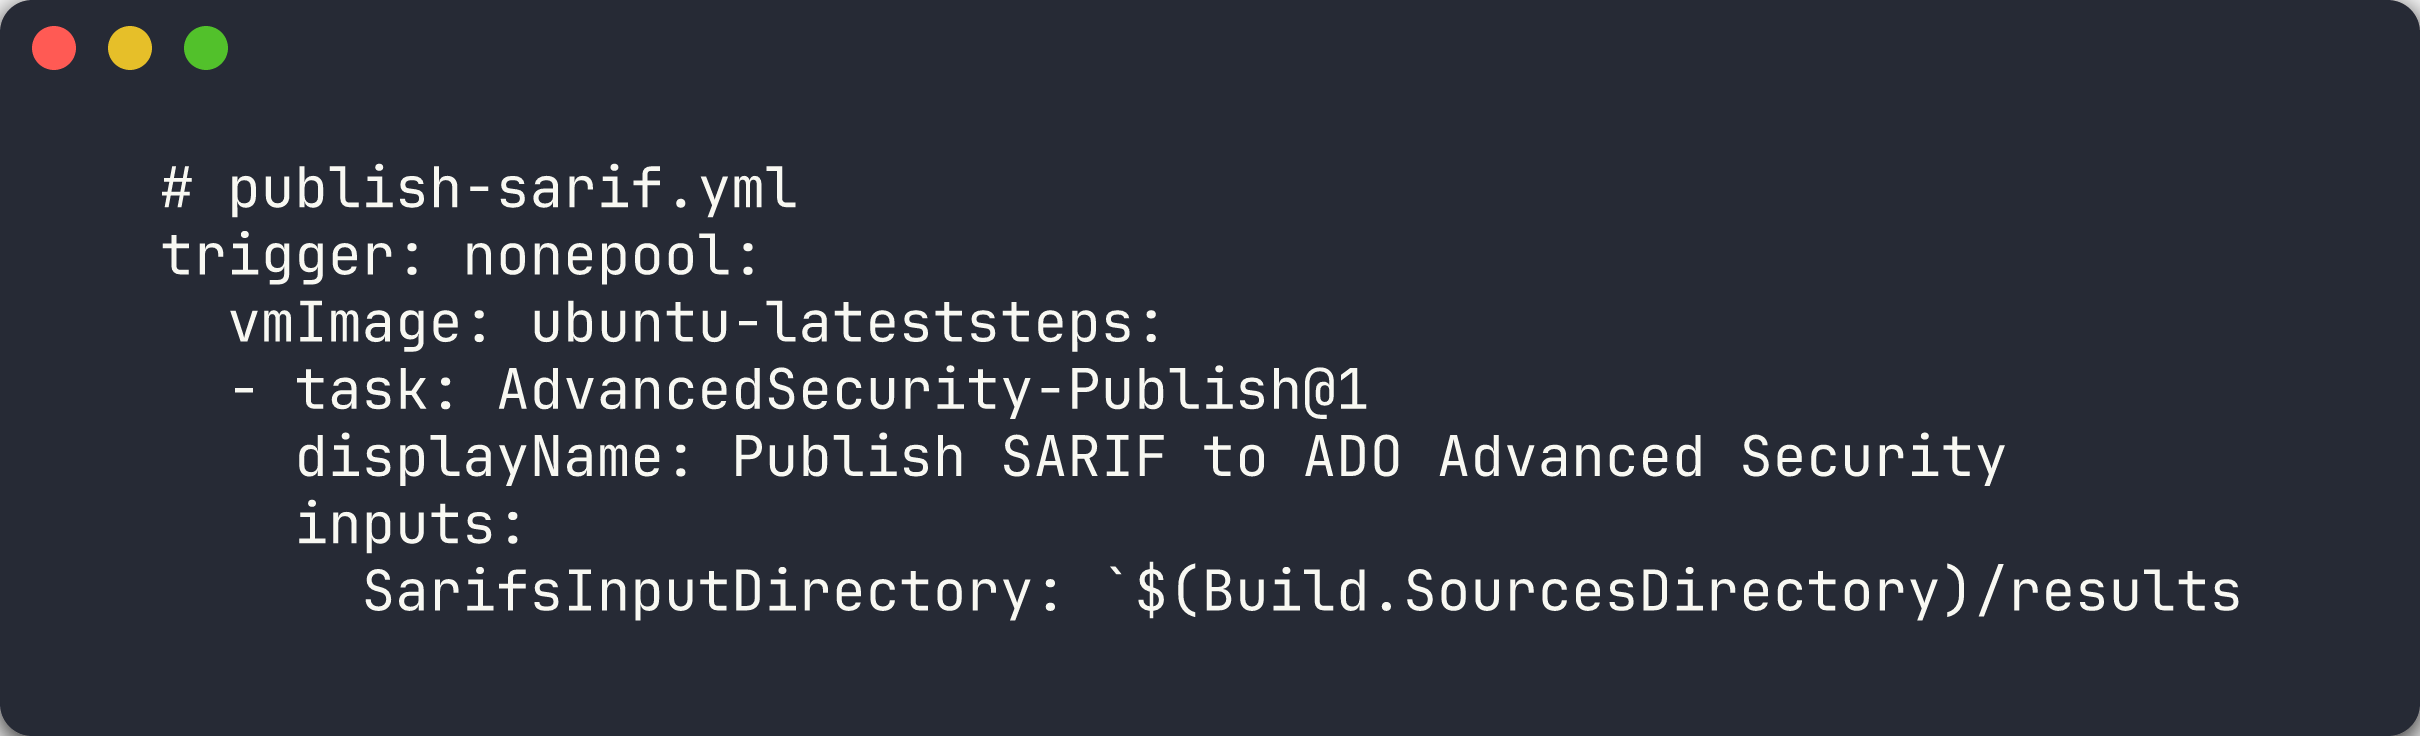
Exercise 6.3: Create SARIF Publish Pipeline
You will create an ADO YAML pipeline that uploads SARIF results to Advanced Security using the AdvancedSecurity-Publish@1 task.
-
In your repository, create the pipeline file at
.azuredevops/pipelines/publish-sarif.yml:trigger: none pool: vmImage: 'ubuntu-latest' steps: - task: AdvancedSecurity-Publish@1 displayName: 'Publish SARIF to ADO Advanced Security' inputs: SarifsInputDirectory: '$(Build.SourcesDirectory)/results' -
The pipeline uses
trigger: noneso it runs only on manual trigger or when called from another pipeline. -
The
AdvancedSecurity-Publish@1task scans the specified directory for.sariffiles and uploads them to ADO Advanced Security. Place your SARIF files in theresults/directory at the repository root. -
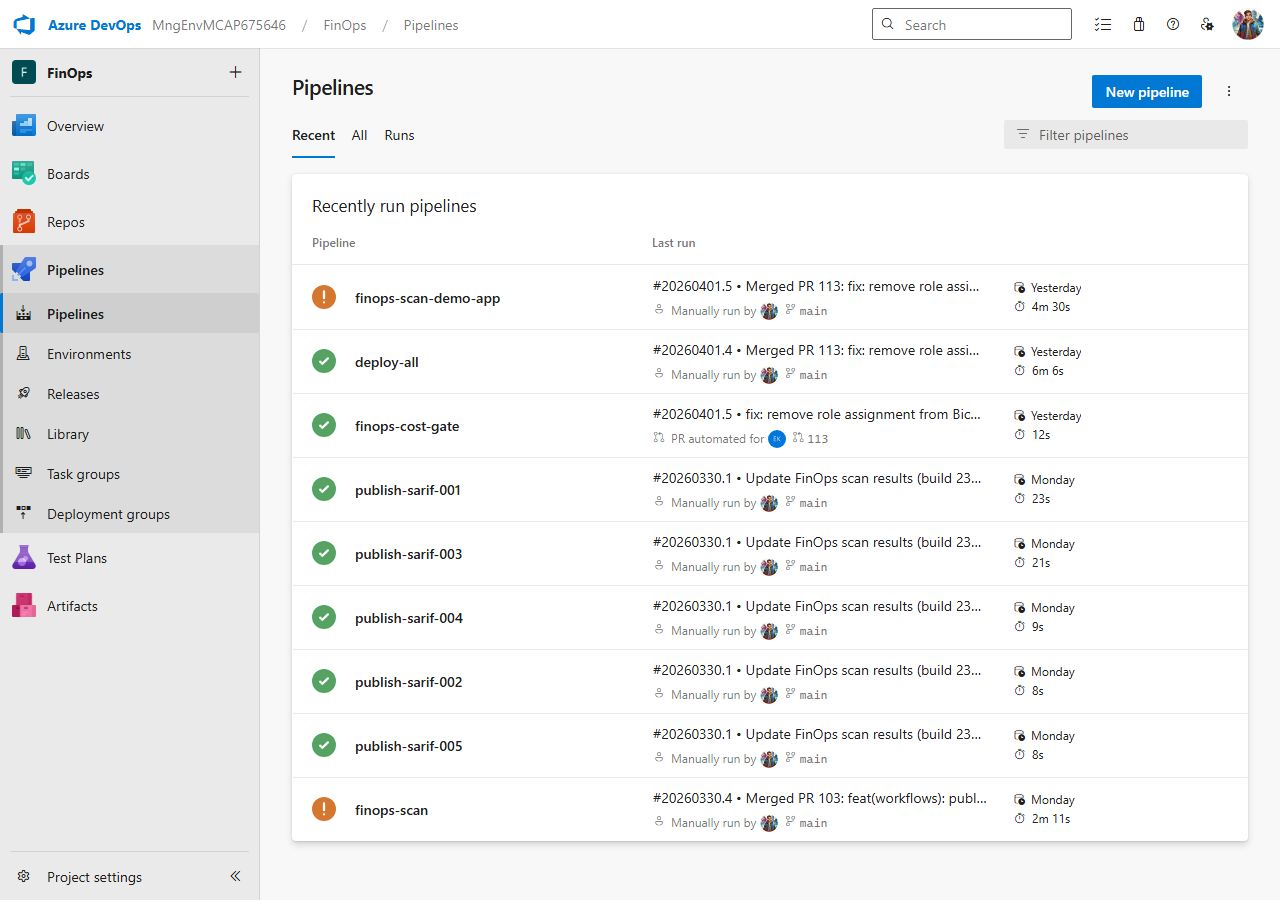
Register the pipeline in ADO:
- Navigate to Pipelines → Pipelines in the FinOps project
- Click New Pipeline
- Select Azure Repos Git as the source
- Select the repository containing the YAML file
- Choose Existing Azure Pipelines YAML file
- Set the path to
.azuredevops/pipelines/publish-sarif.yml - Click Save (not Run — you will run it in the next exercise)
[!TIP] The
AdvancedSecurity-Publish@1task is the ADO equivalent of GitHub’sgithub/codeql-action/upload-sarif@v4. Both consume SARIF files, but the ADO task publishes directly to the ADO Advanced Security backend rather than the GitHub Code Scanning API.
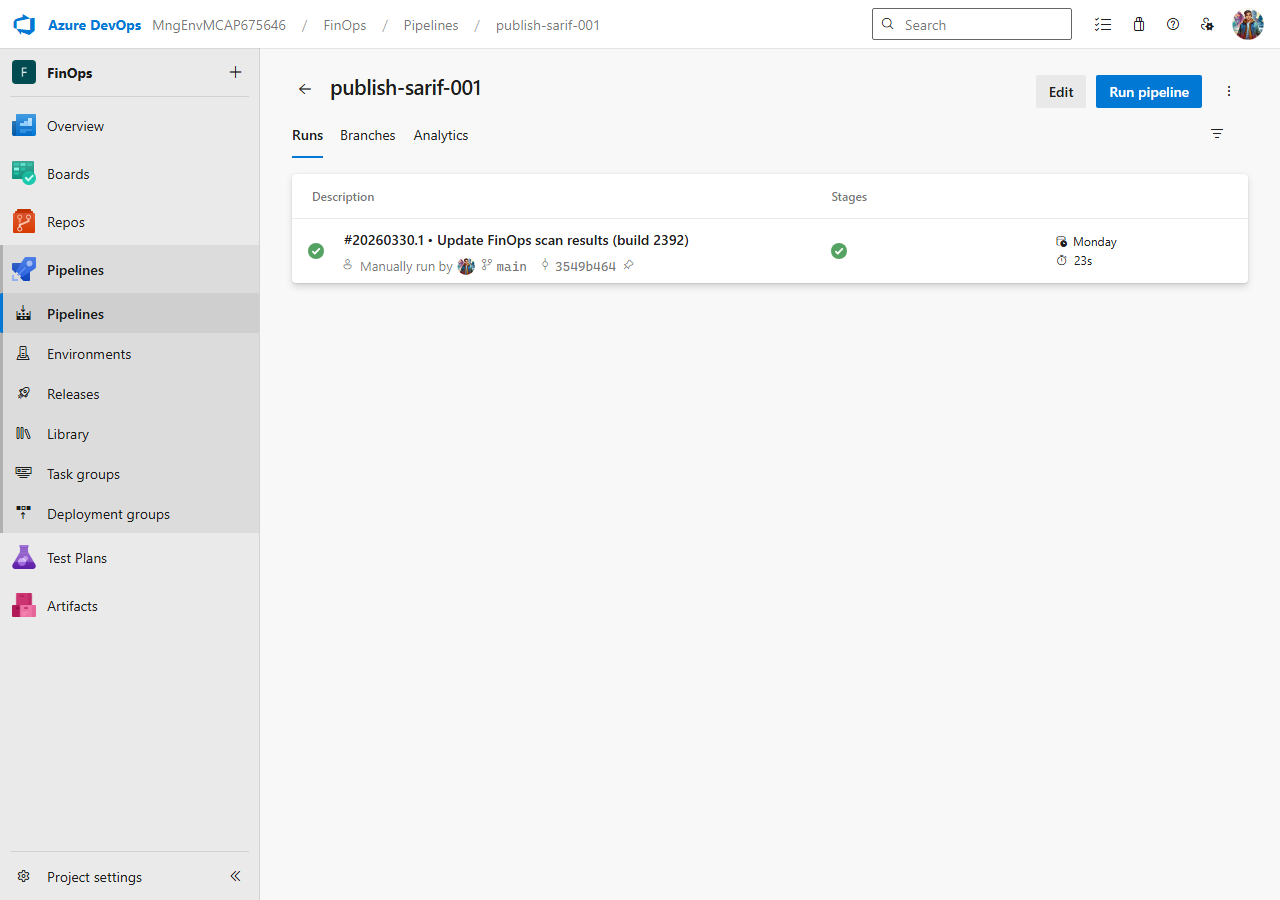
Exercise 6.4: Run Pipeline and Upload SARIF
You will queue the publish-sarif pipeline and upload SARIF results to ADO Advanced Security.
-
Make sure you have at least one
.sariffile in theresults/directory of your repository. You can copy a file from a previous lab:mkdir -p results cp reports/psrule-001.sarif results/ git add results/ git commit -m "chore: add SARIF results for ADO upload" git push - Queue the pipeline from the ADO web UI:
- Navigate to Pipelines → Pipelines
- Find the publish-sarif pipeline
- Click Run pipeline
- Select the branch containing your SARIF files
- Click Run
-
Alternatively, trigger the pipeline from the command line:
az pipelines run --name publish-sarif --organization https://dev.azure.com/MngEnvMCAP675646 --project FinOps -
Monitor the pipeline execution. Click on the running pipeline to see the job logs.
- Verify the
AdvancedSecurity-Publish@1step completed successfully. The logs should show the number of SARIF files processed and results uploaded.
[!NOTE] If the pipeline fails with a permissions error, verify that Advanced Security is enabled for the repository (Exercise 6.2) and that the pipeline has the required permissions to publish security results.
Exercise 6.5: View ADO Advanced Security Overview
You will navigate to the ADO Advanced Security overview to review the uploaded findings.
-
In the FinOps project, navigate to Repos in the left sidebar.
-
Click Advanced Security to open the security overview.
- Review the findings dashboard. Findings are grouped by:
- Severity — Critical, High, Medium, Low
- Tool — the scanner that produced the finding
- State — Active, Dismissed
- Click on an individual alert to see the detail view:
- Rule ID and description
- Severity level
- Source file location with line number
- First detected and last seen timestamps
- Use the State dropdown on an alert to triage it:
- Active — the finding needs attention
- Dismissed — mark as false positive or won’t fix
- Use the filter controls at the top to narrow results by severity, tool, or state.
[!TIP] ADO Advanced Security retains alert history across pipeline runs. If you fix a violation and re-scan, the alert state changes to Fixed automatically. This is similar to how GitHub Code Scanning tracks alert lifecycle across commits.
Exercise 6.6: Compare GitHub vs ADO
You will compare the security alert experience across both platforms.
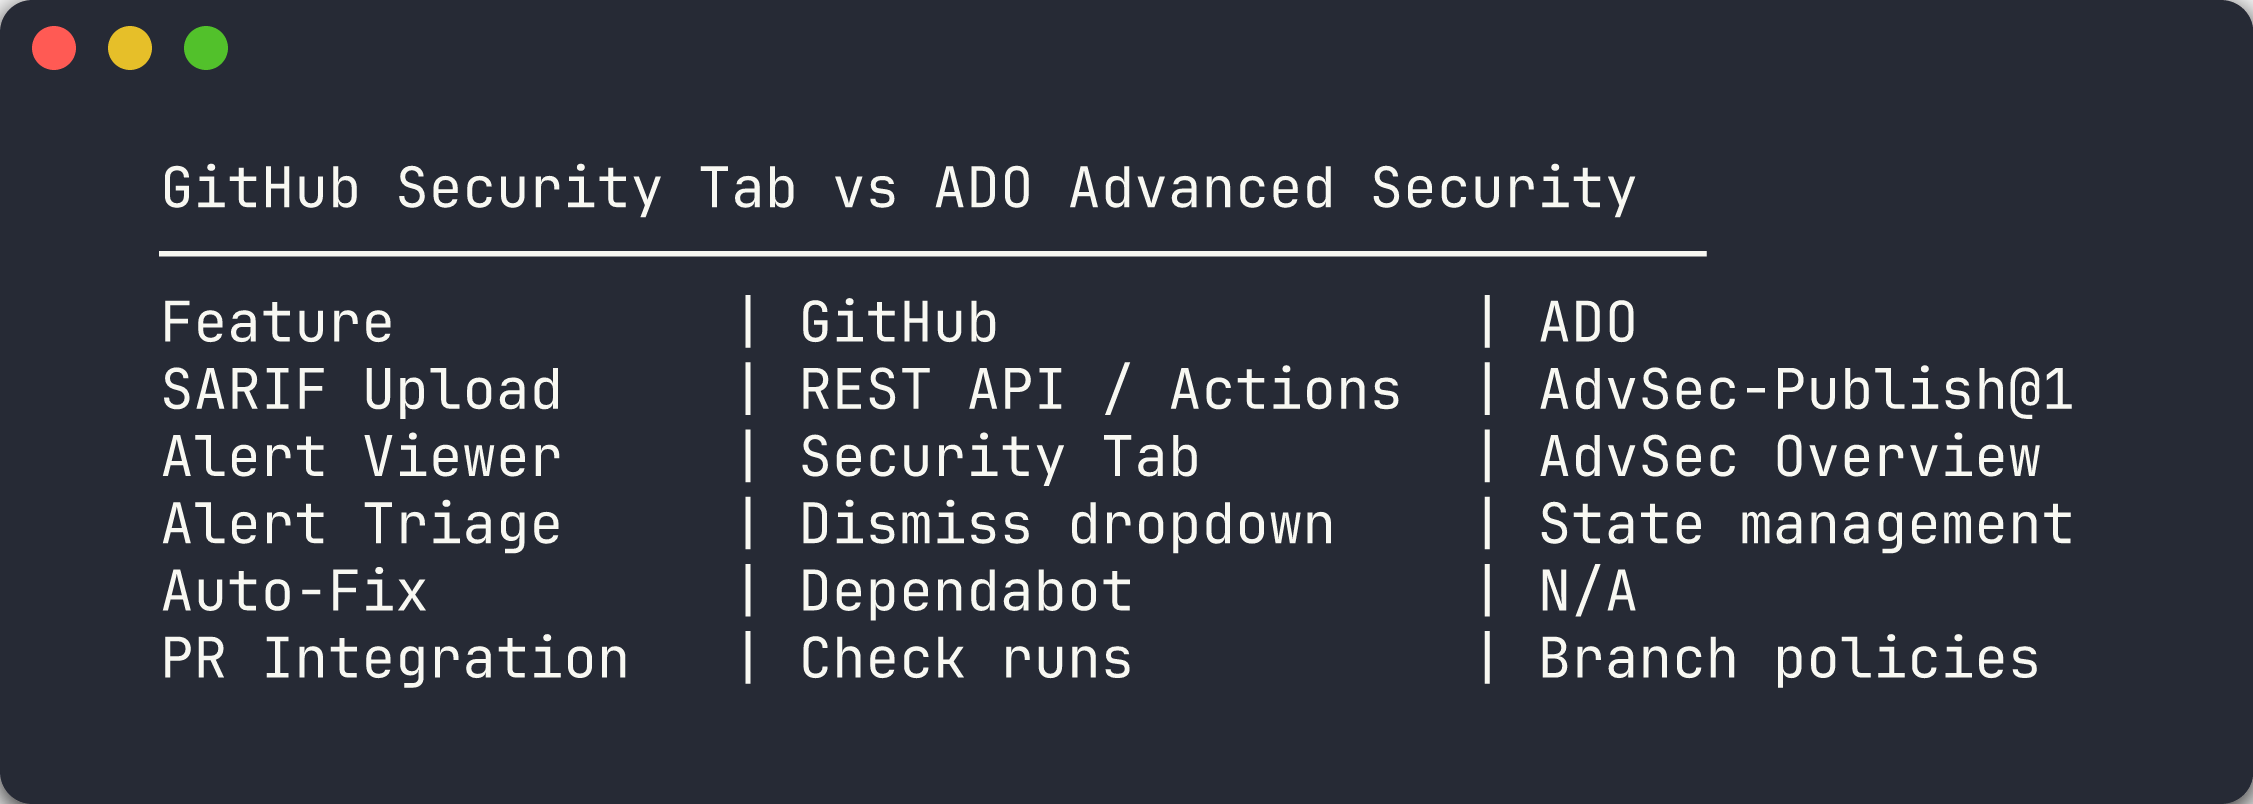
Review the following comparison table:
| Feature | GitHub | Azure DevOps |
|---|---|---|
| SARIF Upload | REST API / codeql-action/upload-sarif@v4 | AdvancedSecurity-Publish@1 |
| Alert Viewer | Security Tab → Code Scanning | Repos → Advanced Security |
| Alert Triage | Dismiss dropdown (false positive, won’t fix, used in tests) | State management (Active, Dismissed) |
| Auto-Fix | Dependabot / Copilot Autofix | Not available |
| PR Integration | Check runs + status checks | Branch policies |
| API Access | Code Scanning REST API | ADO REST API |
Key differences to note:
-
Upload mechanism — GitHub uses a REST API with gzip+base64 encoding. ADO uses a dedicated pipeline task that reads SARIF files from a directory.
-
Triage granularity — GitHub offers three dismiss reasons (false positive, won’t fix, used in tests). ADO uses a simpler Active/Dismissed state model.
-
Auto-remediation — GitHub has Dependabot and Copilot Autofix for automated fixes. ADO Advanced Security does not offer automated fix suggestions.
-
PR integration — GitHub uses check runs and status checks. ADO uses branch policies that can gate PR completion on security findings.
-
Both platforms consume the same SARIF v2.1.0 standard, so you can use the same scanner output for both.
[!IMPORTANT] In a dual-platform environment, run your scanners once and upload the same SARIF output to both GitHub and ADO. This eliminates result divergence and ensures consistent governance across platforms.
Verification Checkpoint
Before proceeding, verify:
- Can describe how ADO Advanced Security ingests SARIF results
- Enabled Advanced Security on at least one repository
- Created and ran the publish-sarif pipeline successfully
- Viewed and triaged findings in the ADO Advanced Security Overview
- Can articulate 3 differences between GitHub Security Tab and ADO Advanced Security
Next Steps
Continue to Lab 07-ADO — ADO YAML Pipelines and Cost Gates.
[!NOTE] For the GitHub variant of this lab, see Lab 06 — SARIF Output and GitHub Security Tab.