Overview
| Duration | 30 minutes |
| Level | Intermediate |
| Prerequisites | Lab 02, Lab 03, Lab 04, or Lab 05 (at least one) |
[!TIP] Using Azure DevOps? See Lab 06-ADO — SARIF Output and ADO Advanced Security for the ADO variant of this lab.
Learning Objectives
By the end of this lab, you will be able to:
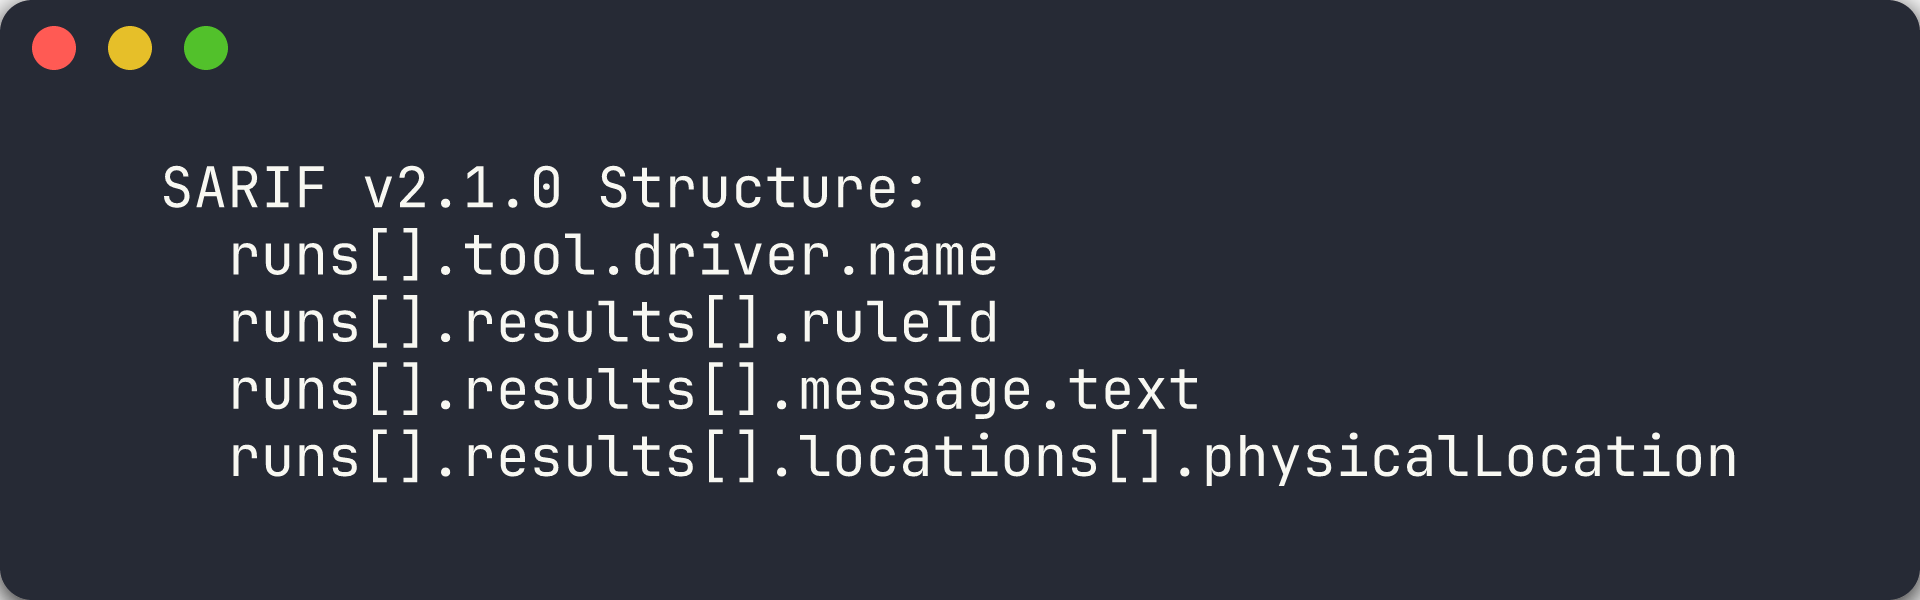
- Explain the SARIF v2.1.0 schema including runs, tool, rules, results, and locations
- Upload SARIF results to GitHub Code Scanning via the REST API
- Navigate the GitHub Security tab to view FinOps alerts
- Filter, triage, and dismiss alerts in the Security tab
Exercises
Exercise 6.1: SARIF Schema Deep-Dive
You will examine the SARIF v2.1.0 format that all four scanner tools produce.
-
Open any SARIF file you generated in a previous lab (for example,
reports/psrule-001.sariforreports/custodian.sarif). -
Review the top-level structure. Every SARIF file follows this schema:
{ "version": "2.1.0", "$schema": "https://raw.githubusercontent.com/oasis-tcs/sarif-spec/main/sarif-2.1/schema/sarif-schema-2.1.0.json", "runs": [ { "tool": { "driver": { "name": "CloudCustodian", "version": "1.0.0", "informationUri": "https://cloudcustodian.io", "rules": [ { "id": "check-required-tags", "name": "check-required-tags", "shortDescription": { "text": "Cloud Custodian policy violation" }, "defaultConfiguration": { "level": "warning" } } ] } }, "results": [ { "ruleId": "check-required-tags", "level": "warning", "message": { "text": "Resource rg-finops-demo-001 violates policy check-required-tags" }, "locations": [ { "physicalLocation": { "artifactLocation": { "uri": "infra/main.bicep" }, "region": { "startLine": 1 } } } ] } ] } ] } -
Understand the four main sections:
Section Purpose version/$schemaDeclares SARIF v2.1.0 compliance runs[].tool.driverIdentifies the scanner tool, version, and rule definitions runs[].tool.driver.rules[]Defines rule IDs, descriptions, severity, and help URLs runs[].results[]Contains individual findings with rule ID, severity, message, and location -
Note how
physicalLocationties a finding to a specific file and line number. GitHub Code Scanning uses this to annotate source files in pull requests.
[!TIP] SARIF (Static Analysis Results Interchange Format) is an OASIS standard. GitHub, Azure DevOps, and many IDE extensions can consume SARIF files. By producing SARIF from all 4 tools, you get a unified view of FinOps violations across your entire scanning platform.
Exercise 6.2: Upload SARIF Manually
You will upload a SARIF file to the GitHub Code Scanning API using the GitHub CLI.
-
Choose a SARIF file from a previous lab. This example uses the PSRule output for app 001:
SARIF_FILE="reports/psrule-001.sarif" -
Compress and base64-encode the SARIF file (required by the API):
cat $SARIF_FILE | gzip | base64 > /tmp/sarif-base64.txtOn Windows PowerShell:
$bytes = [System.IO.File]::ReadAllBytes("reports/psrule-001.sarif") $ms = New-Object System.IO.MemoryStream $gz = New-Object System.IO.Compression.GZipStream($ms, [System.IO.Compression.CompressionMode]::Compress) $gz.Write($bytes, 0, $bytes.Length) $gz.Close() $encoded = [Convert]::ToBase64String($ms.ToArray()) $encoded | Out-File /tmp/sarif-base64.txt -NoNewline -
Upload to the Code Scanning endpoint:
gh api -X POST /repos/{owner}/{repo}/code-scanning/sarifs \
  -f "commit_sha=$(git rev-parse HEAD)" \
  -f "ref=refs/heads/main" \
  -f "sarif=$(cat /tmp/sarif-base64.txt)" \
  -f "tool_name=PSRule"
Replace
{owner}and{repo}with your fork’s owner and repository name. -
The API returns a response with a
urlfield. You can poll this URL to check the processing status:gh api /repos/{owner}/{repo}/code-scanning/sarifs/{sarif_id} -
Processing takes a few seconds. Once complete, the findings appear in the Security tab.

[!IMPORTANT] The Code Scanning API requires the repository to have GitHub Advanced Security enabled. If you receive a 403 error, check that GHAS is enabled in your repository settings under Settings → Code security and analysis.
Exercise 6.3: View Security Tab
You will navigate to the GitHub Security tab to view the uploaded FinOps alerts.
-
Open your repository on GitHub.
-
Click the Security tab in the top navigation bar.
-
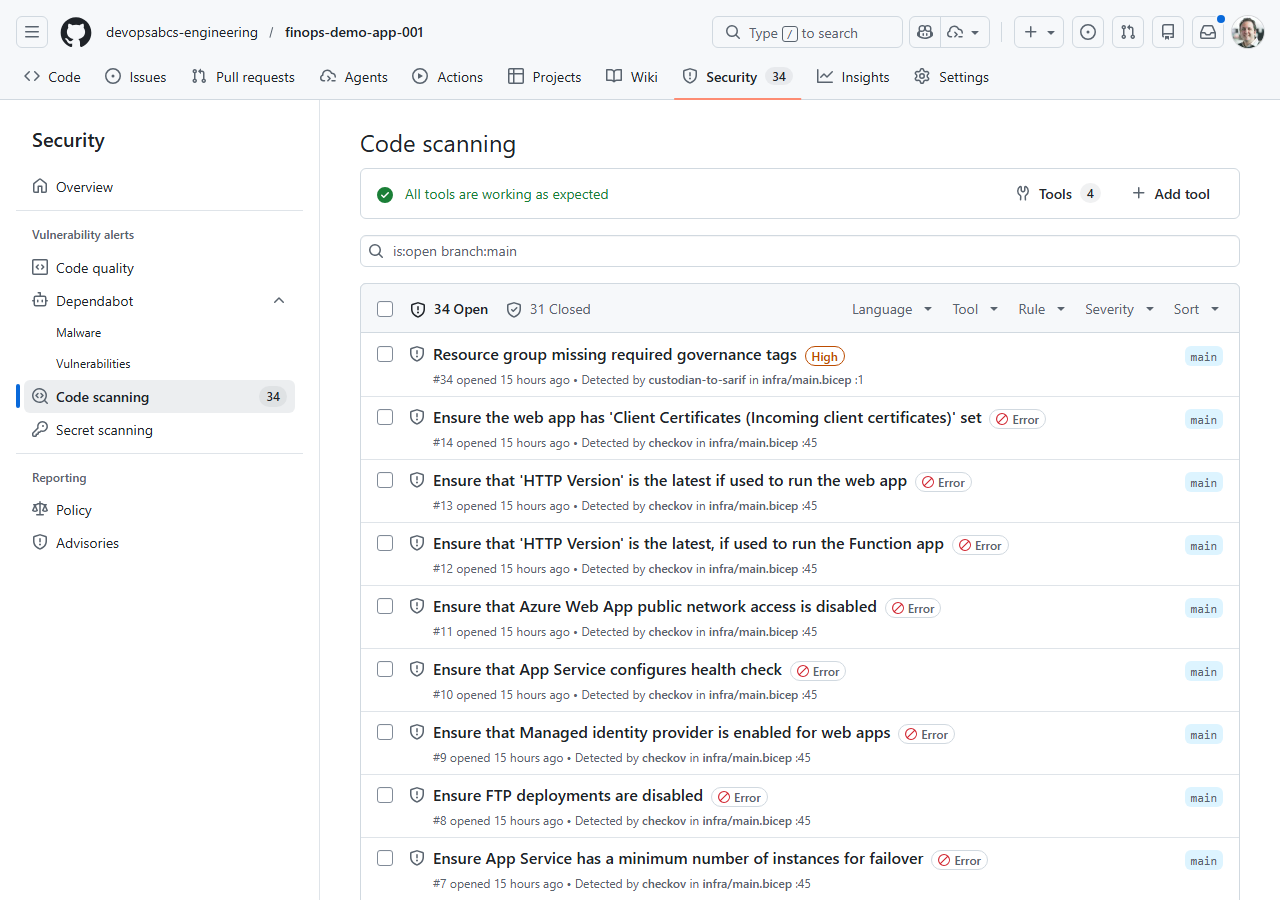
Click Code scanning in the left sidebar.
- You should see alerts from the SARIF file you uploaded. Each alert shows:
- Rule ID — the scanner-specific rule identifier
- Severity — error, warning, or note
- File — the source file where the violation was detected
- Tool — the scanner that produced the finding (PSRule, Checkov, Cloud Custodian, or Infracost)
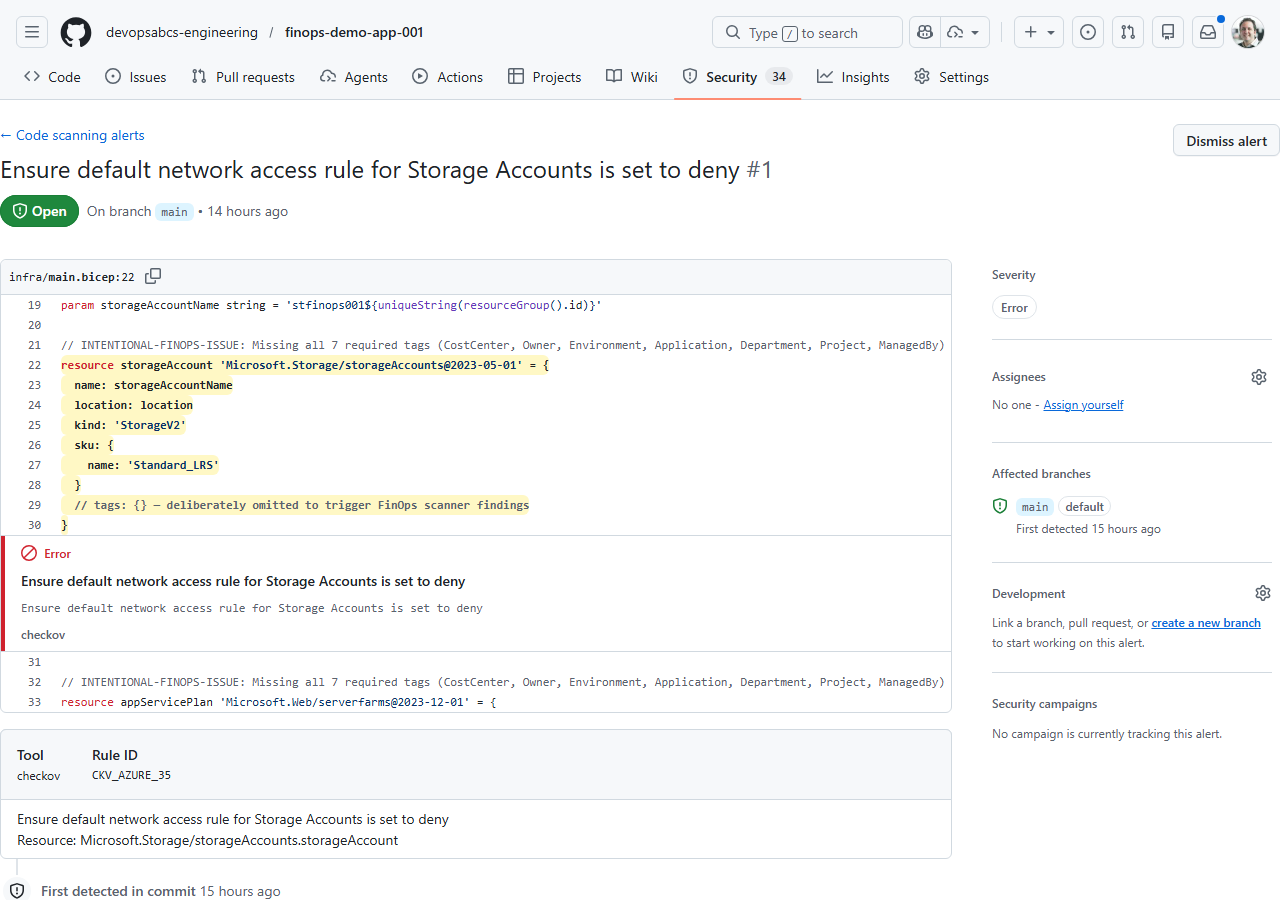
- Click on an individual alert to see the full detail view:
- The finding description and remediation guidance
- The source code location highlighted in the file
- The SARIF rule metadata
[!NOTE] If you uploaded SARIF from multiple tools, use the Tool filter to view findings from a specific scanner. This helps during triage when you want to focus on one category of violations at a time.
Exercise 6.4: Triage Alerts
You will practise the triage workflow for FinOps alerts.
-
In the Code scanning alerts list, click on any alert.
- Use the Dismiss alert dropdown to explore the triage options:
- False positive — the alert does not apply to this resource
- Won’t fix — acknowledged but not worth addressing
- Used in tests — the violation is intentional for testing purposes
-
Dismiss one alert as Used in tests (since these demo apps are intentionally misconfigured).
- Use the filter controls to narrow the alert list:
- Filter by Tool — show only PSRule, Checkov, or Cloud Custodian findings
- Filter by Severity — show only errors, warnings, or notes
- Filter by State — show open, dismissed, or fixed alerts
- Mark one alert as Closed to simulate a remediation workflow. In practice, you would fix the Bicep template and re-scan to confirm the alert resolves.

[!TIP] In a production FinOps programme, assign alert triage to specific team members. Use GitHub Code Scanning API webhooks to create automated notifications when new high-severity FinOps alerts appear.
Exercise 6.5: Cross-Repo Upload
You will understand how the automated pipeline uploads SARIF to each demo app’s repository.
-
Open
.github/workflows/finops-scan.ymland find thecross-repo-uploadjob. -
Review the job configuration:
cross-repo-upload:
  needs: [psrule-scan, checkov-scan, custodian-scan]
  if: always() && (needs.psrule-scan.result == 'success' || needs.checkov-scan.result == 'success')
  runs-on: ubuntu-latest
  strategy:
    matrix:
      app: ['001', '002', '003', '004', '005']
The job runs after all three scan jobs complete and uses a matrix to process each demo app.
- Understand the upload steps:
- Download artifacts — fetches all SARIF files for the current app using
actions/download-artifact@v4with a pattern match - Upload SARIF — iterates over each SARIF file and POSTs it to the target demo app repo’s Code Scanning endpoint
- Download artifacts — fetches all SARIF files for the current app using
-
The upload script compresses each SARIF file, looks up the latest commit SHA on the target repo’s
mainbranch, and calls the Code Scanning API — the same steps you performed manually in Exercise 6.2:SARIF_CONTENT=$(gzip -c "$sarif_file" | base64 -w0) COMMIT_SHA=$(gh api repos/{org}/finops-demo-app-{app}/commits/main --jq '.sha') gh api --method POST \ repos/{org}/finops-demo-app-{app}/code-scanning/sarifs \ -f "commit_sha=$COMMIT_SHA" \ -f "ref=refs/heads/main" \ -f "sarif=$SARIF_CONTENT" - This pattern pushes scan results from a centralised scanner repository outward to each individual app repository, so teams see FinOps alerts directly in their own Security tab.
[!NOTE] The cross-repo upload requires an
ORG_ADMIN_TOKENsecret withsecurity_events: writepermission on all target repositories. Thesetup-oidc.ps1script in Lab 07 does not cover this token — it must be created as a GitHub personal access token or fine-grained token.
Verification Checkpoint
Before proceeding, verify:
- Can describe the 4 main SARIF sections (schema, runs, tool/rules, results)
- Successfully uploaded a SARIF file via
gh api - Viewed FinOps alerts in the GitHub Security tab
- Triaged at least 1 alert (dismissed or marked fixed)
Next Steps
Proceed to Lab 07 — GitHub Actions Pipelines and Cost Gates.