Overview
Learning Objectives
By the end of this lab, you will be able to:
- Understand the structure of the workshop GitHub Actions workflows
- Enable GitHub Actions and configure workflow permissions in your repository
- Create a branch, make changes, and open a pull request to trigger workflows
- Monitor workflow execution and review logs in the Actions tab
Exercises
Exercise 7.1: Review Workflow Files
Explore the four workflow files included in the repository to understand what each one does.
- Open
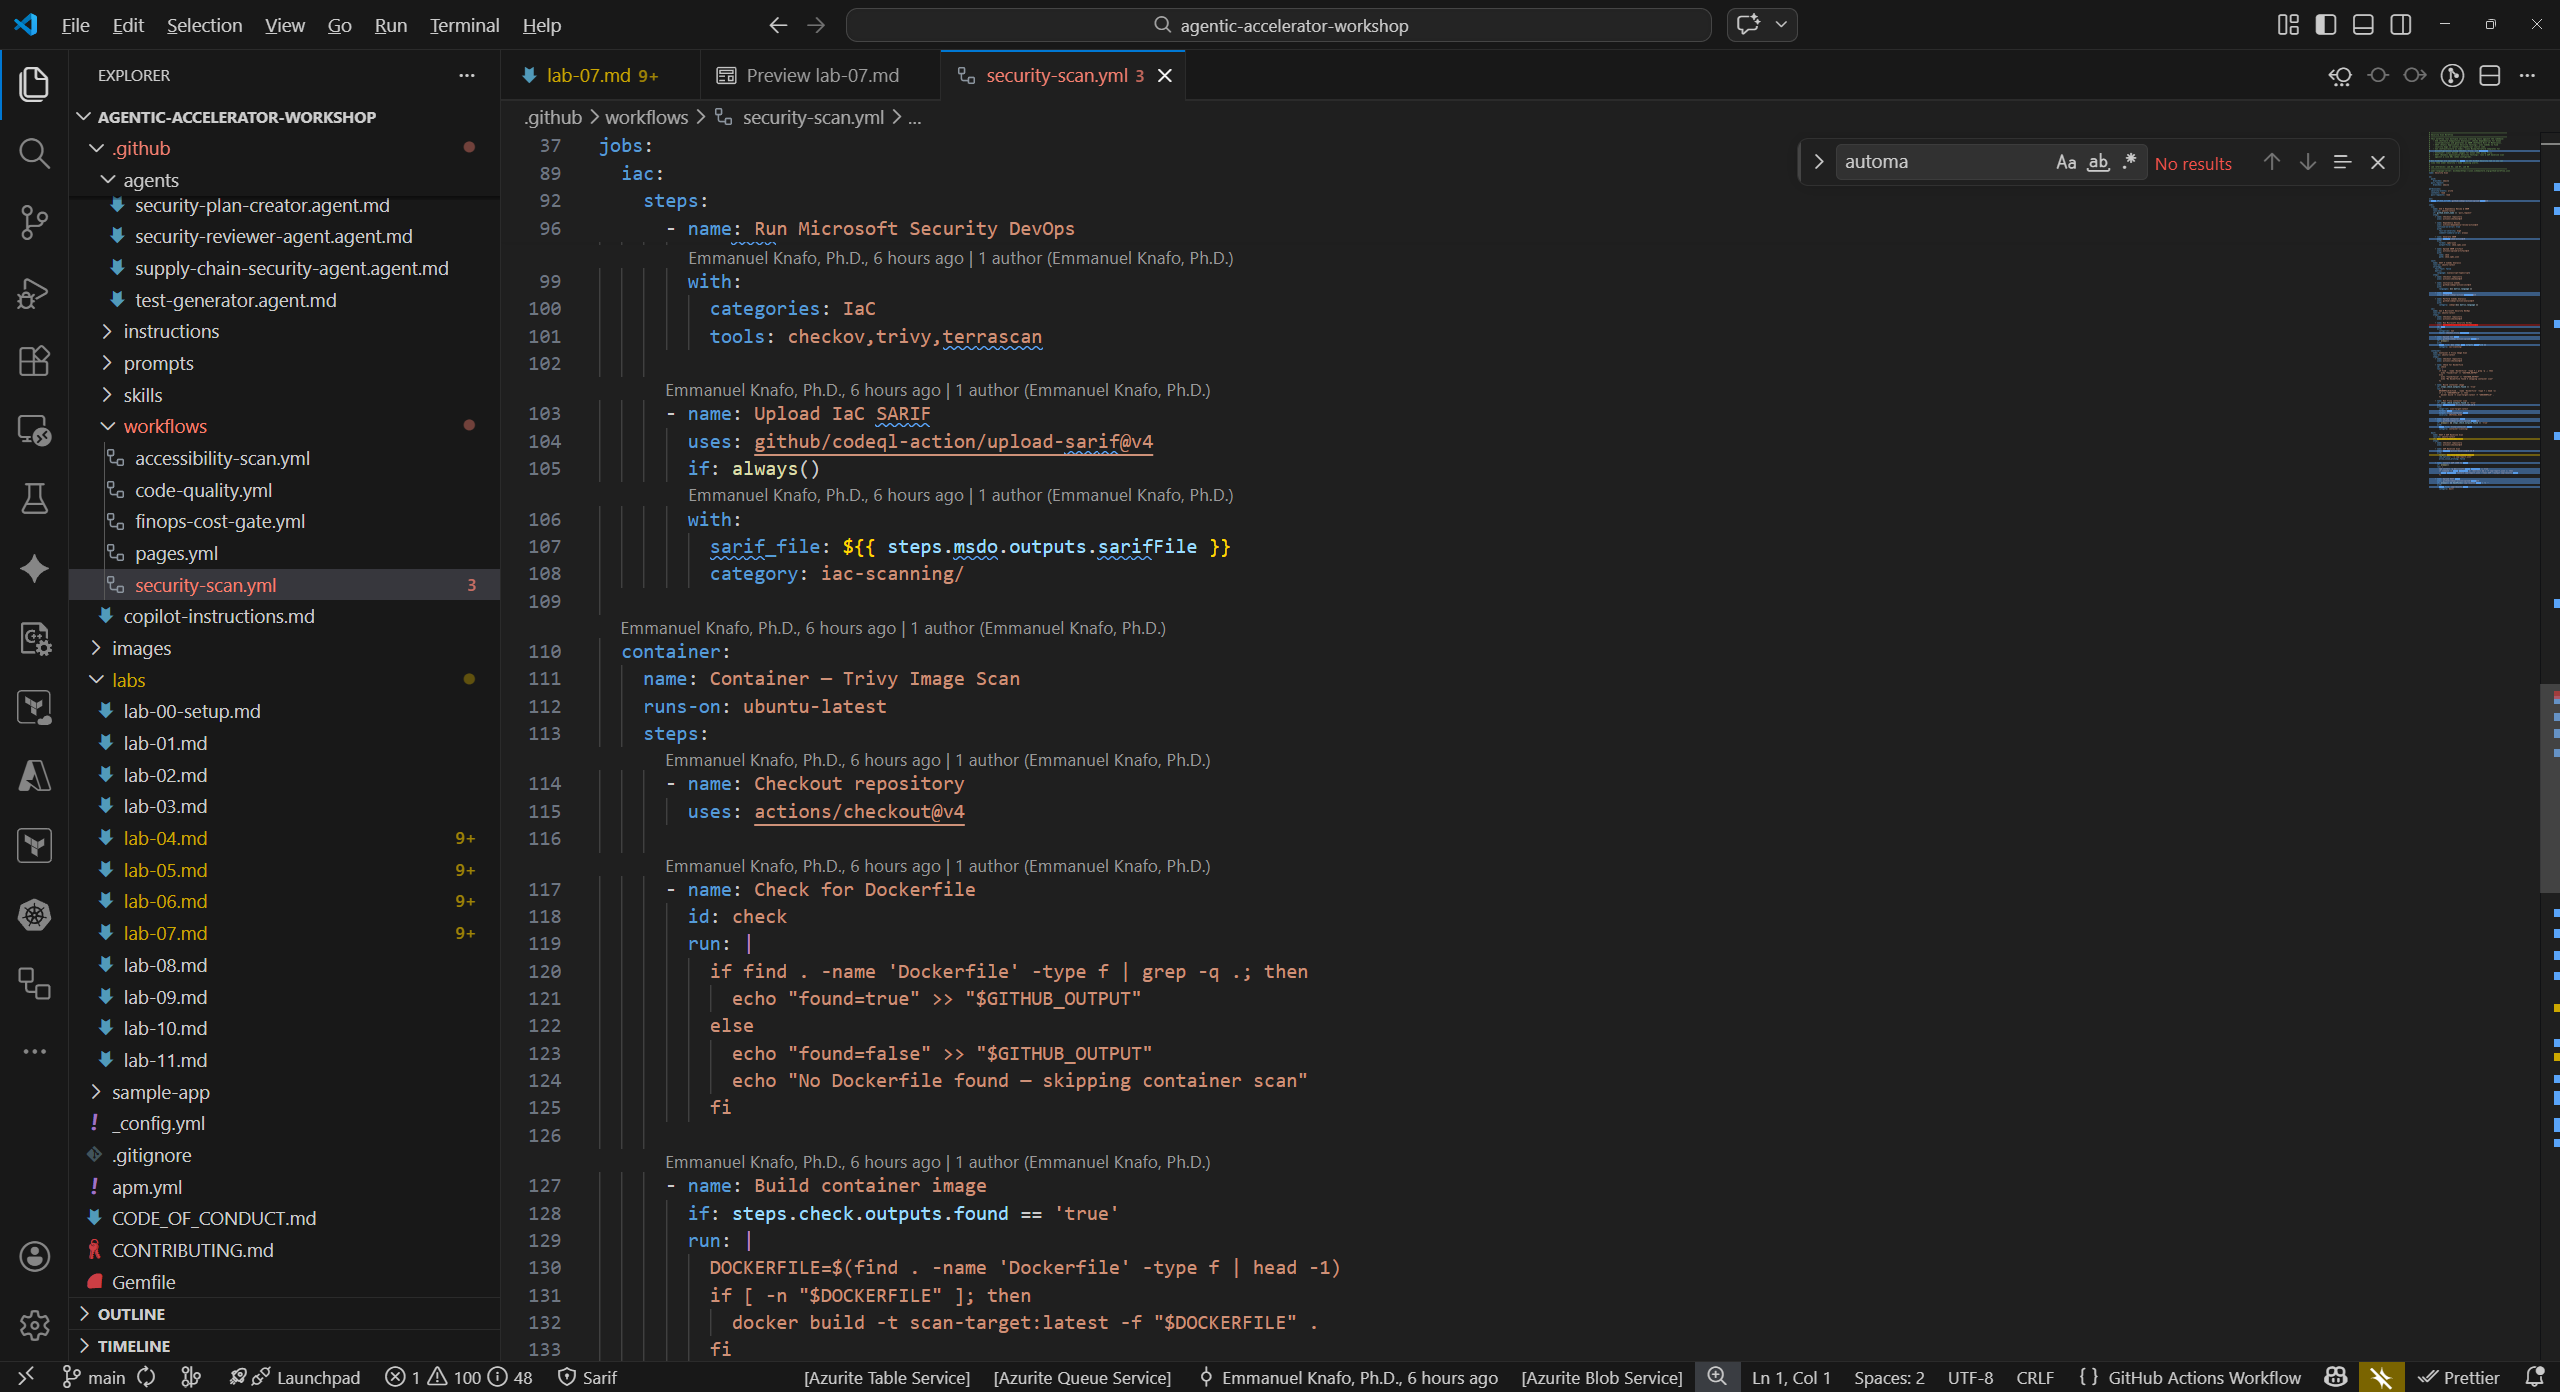
.github/workflows/security-scan.ymlin VS Code. This is the most comprehensive workflow in the set. -
Identify the key structural elements:
Element Value Purpose on.push.branches[main]Triggers on pushes to main on.pull_request.branches[main]Triggers on PRs targeting main permissions.security-eventswriteAllows SARIF upload to Security tab jobsMultiple jobs SCA, SAST, IaC, Container, DAST scans - Locate the SARIF upload step within one of the jobs. It uses
github/codeql-action/upload-sarif@v4to send findings to the GitHub Security tab. -
Review the remaining three workflows briefly:
Workflow File Name Trigger SARIF Category accessibility-scan.ymlAccessibility Scan PR + weekly schedule accessibility-scan/code-quality.ymlCode Quality PR only code-quality/coverage/finops-cost-gate.ymlFinOps Cost Gate PR (infra file changes) finops-finding/ - Note that all four workflows upload SARIF to the Security tab. The different
categoryvalues ensure findings are grouped by domain.
Exercise 7.2: Enable GitHub Actions
Confirm that GitHub Actions is enabled and permissions are configured correctly for your forked repository.
- Navigate to your repository on GitHub.
- Go to Settings → Actions → General.
- Under Actions permissions, select Allow all actions and reusable workflows. This is required because the workflows reference third-party actions such as
anchore/sbom-actionandgithub/codeql-action. - Scroll to Workflow permissions.
- Select Read and write permissions for the
GITHUB_TOKEN. The workflows need write access to upload SARIF files to the Security tab. - Check Allow GitHub Actions to create and approve pull requests if available.
- Click Save to apply the changes.
[!TIP] If your organization enforces stricter policies, you may need to ask an administrator to allow the specific actions used in these workflows.
Exercise 7.3: Trigger Workflows with a Pull Request
Create a branch, make a small change, and open a pull request to trigger the workflow runs.
-
Open a terminal in VS Code and create a new branch:
git checkout -b feature/test-pipeline -
Open
sample-app/src/app/page.tsxand make a visible change. For example, add a comment at the top of the file:// Test change to trigger pipeline workflows -
Stage, commit, and push the change:
git add sample-app/src/app/page.tsx git commit -m "test: trigger pipeline scan" git push -u origin feature/test-pipeline - Open your repository in a browser. GitHub should display a banner suggesting you create a pull request for the recently pushed branch.
- Click Compare & pull request.
- Set the target branch to
main, add a descriptive title such as “Test pipeline trigger”, and click Create pull request.
Exercise 7.4: Monitor Workflow Execution
Watch the workflows run and explore the execution logs.
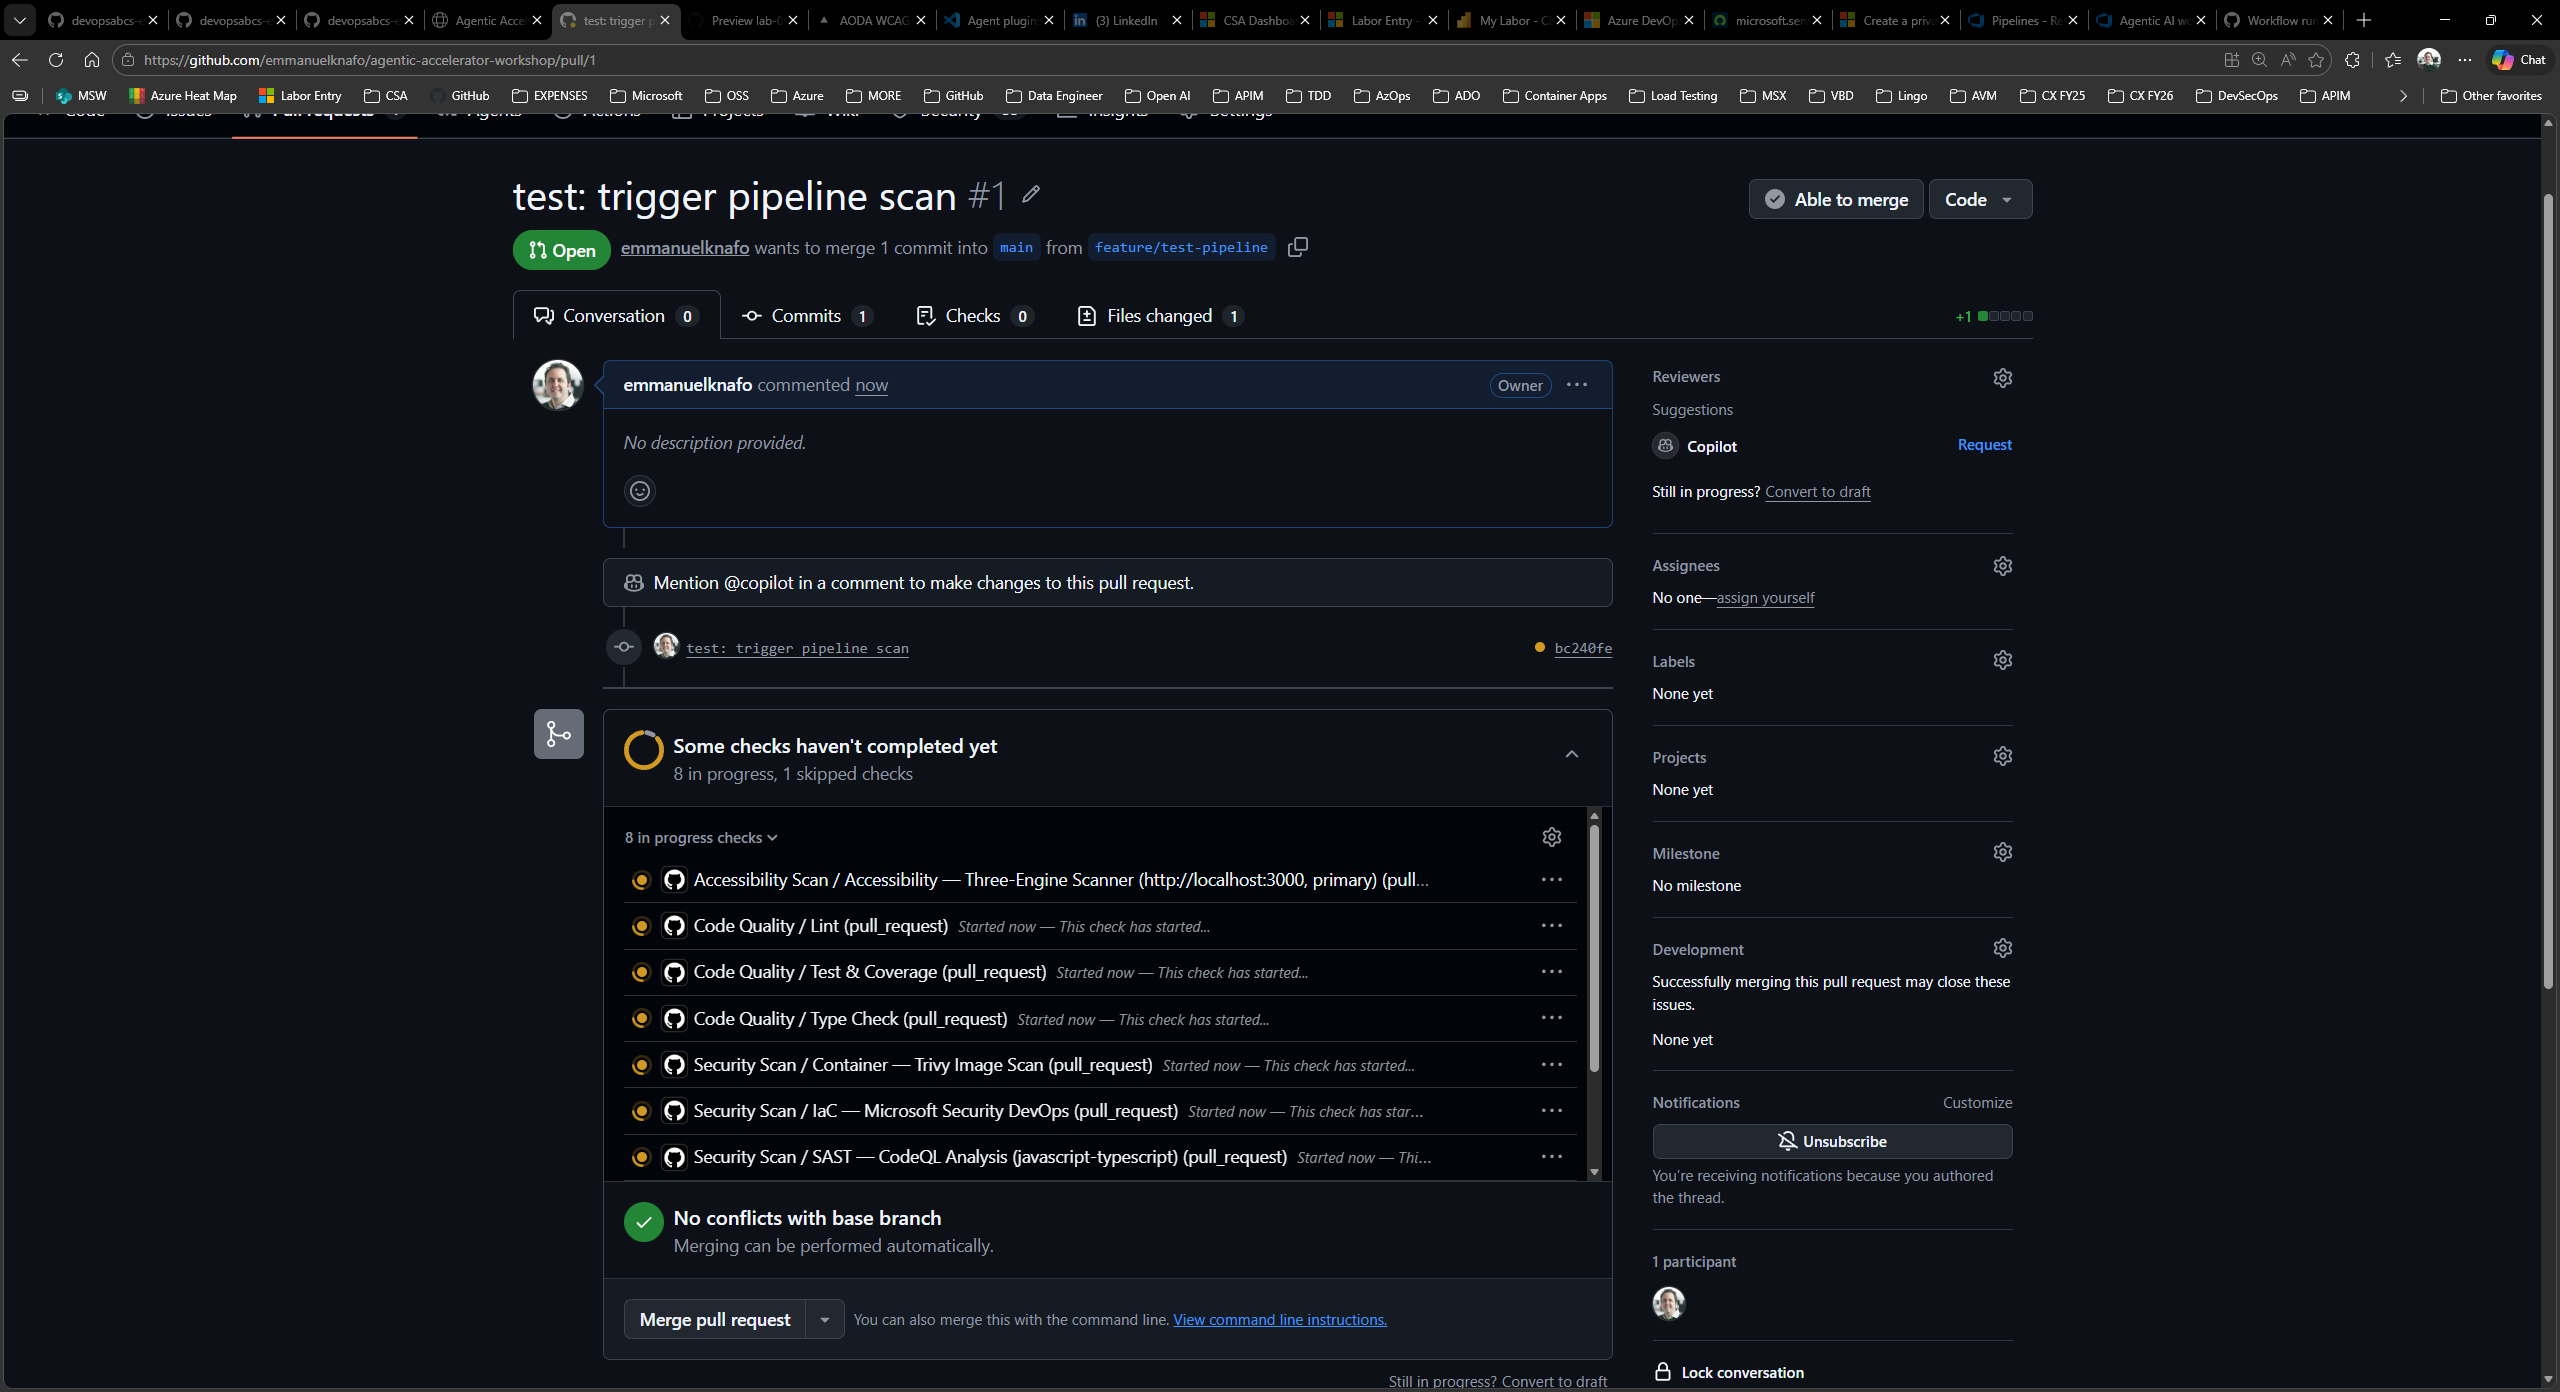
- In your pull request, scroll down to the checks section. You should see workflow runs starting to appear.
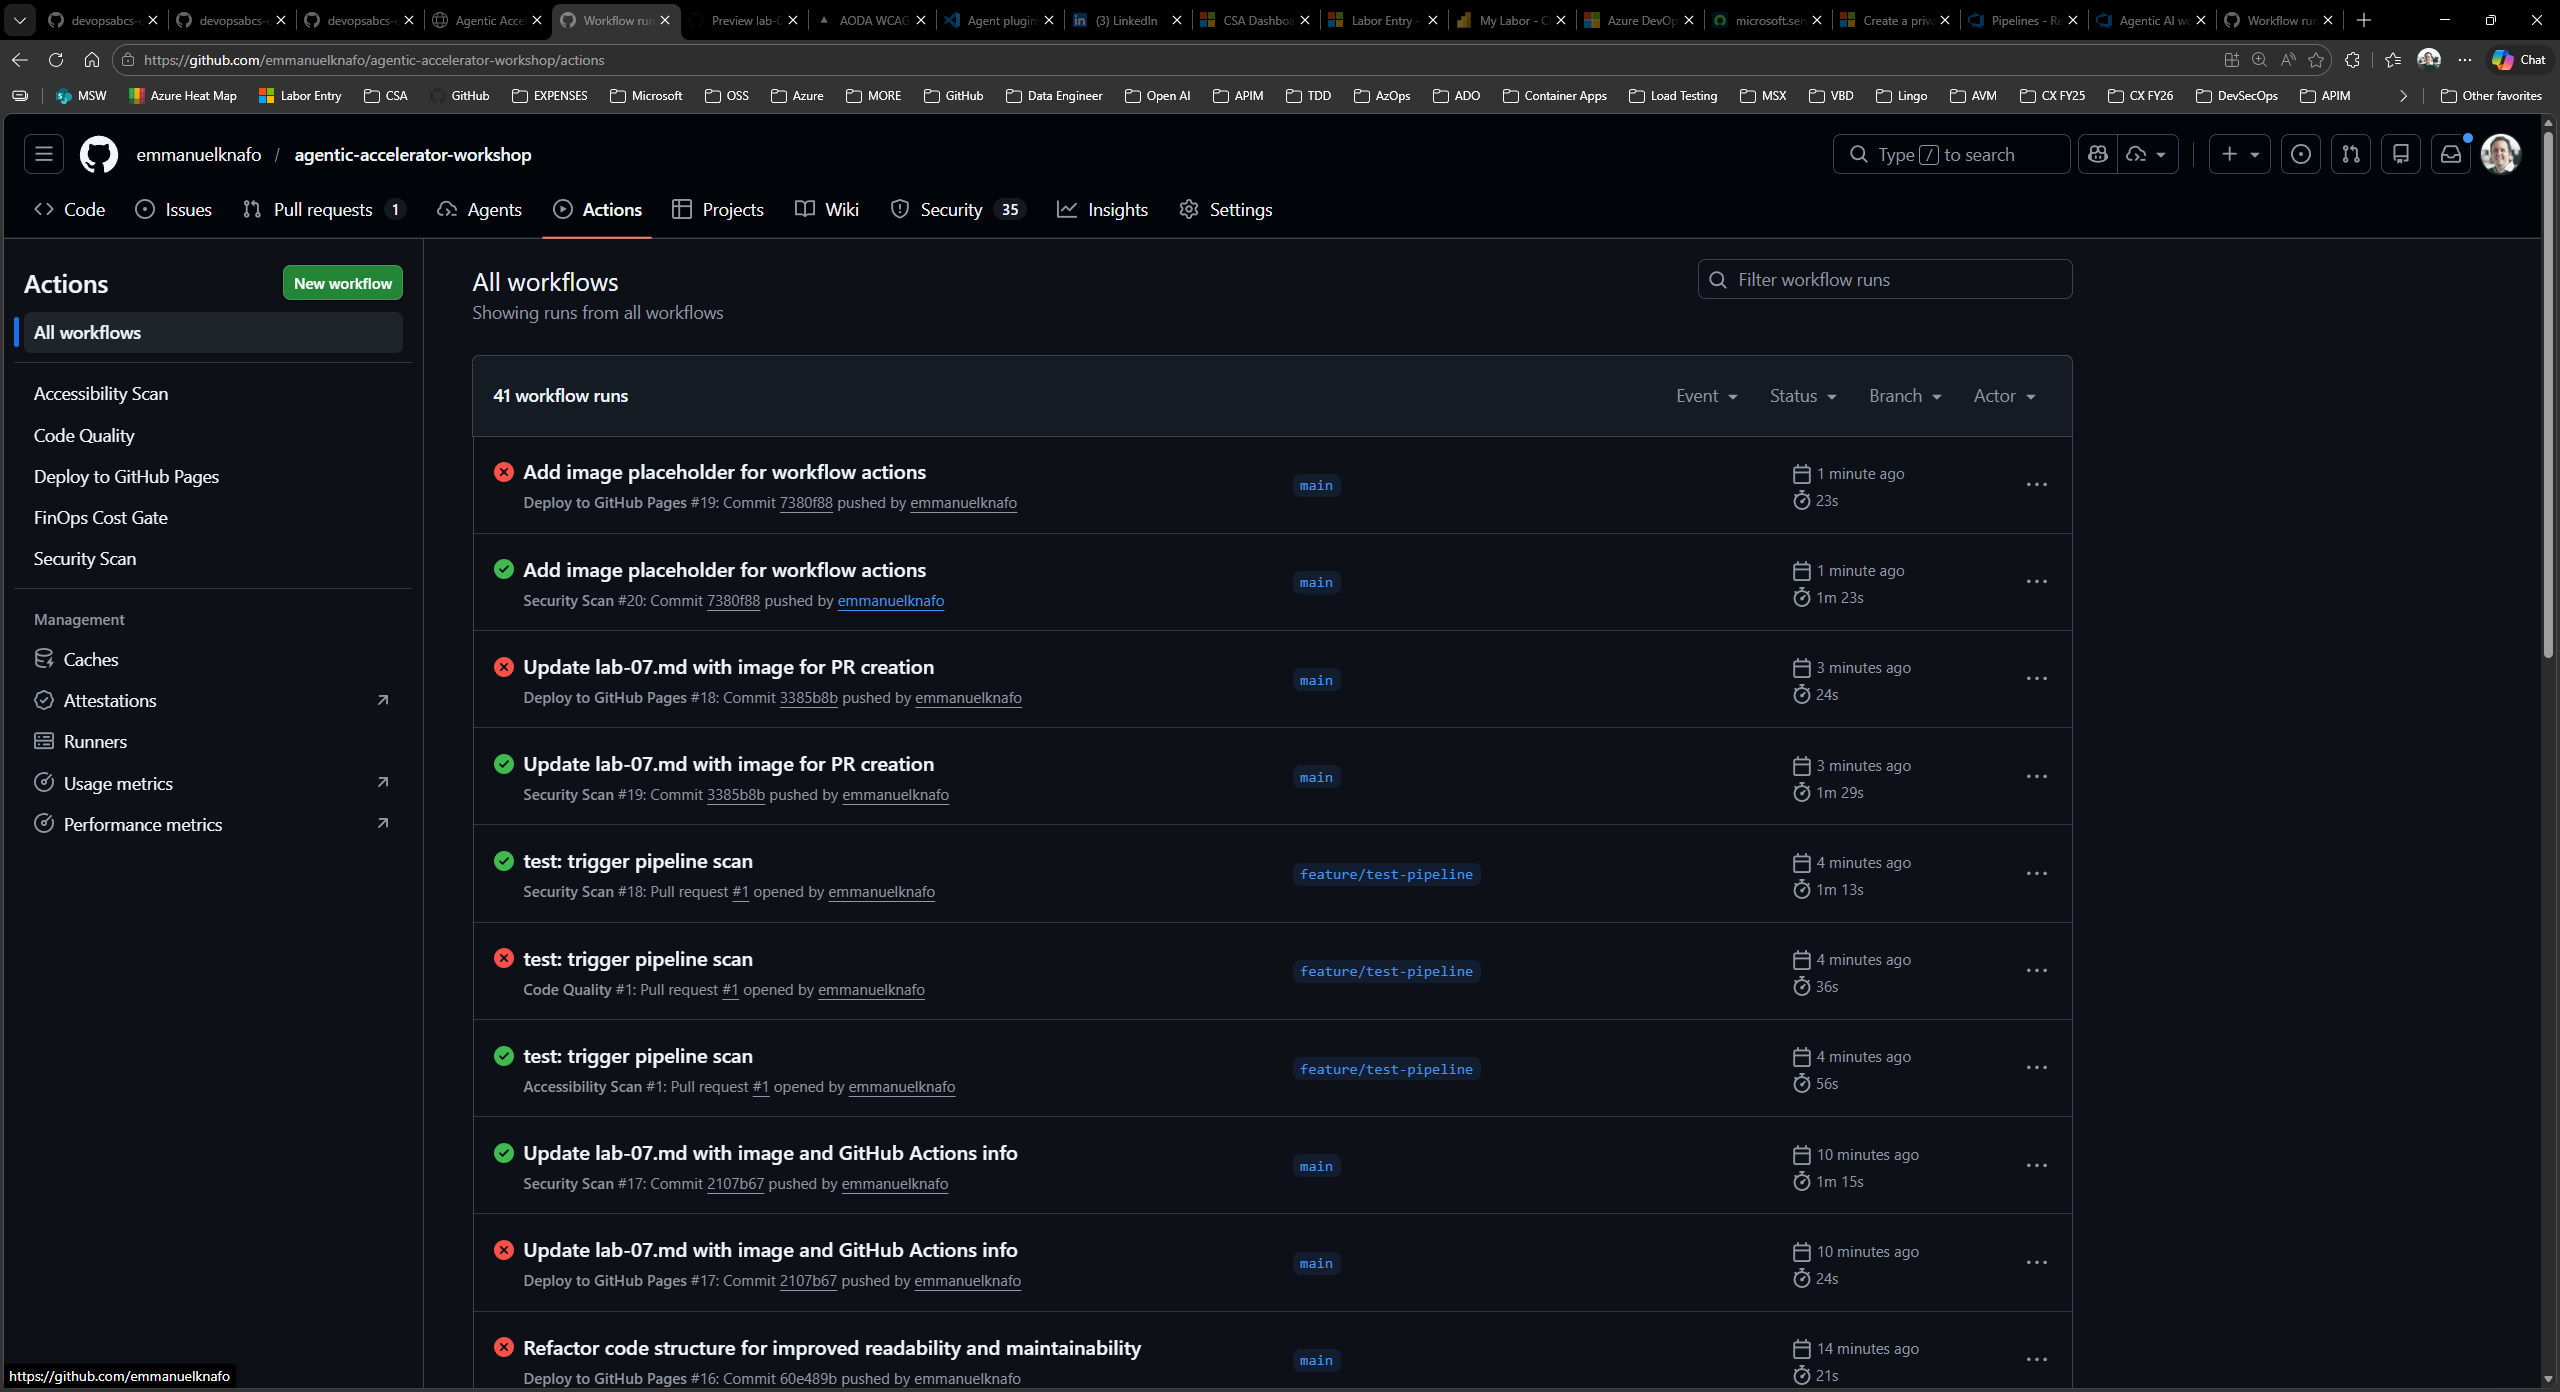
- Click the Actions tab at the top of the repository page.
- Locate the triggered workflow runs. You should see at least the Security Scan and Code Quality workflows running (the Accessibility Scan and FinOps Cost Gate may also trigger depending on your changes).
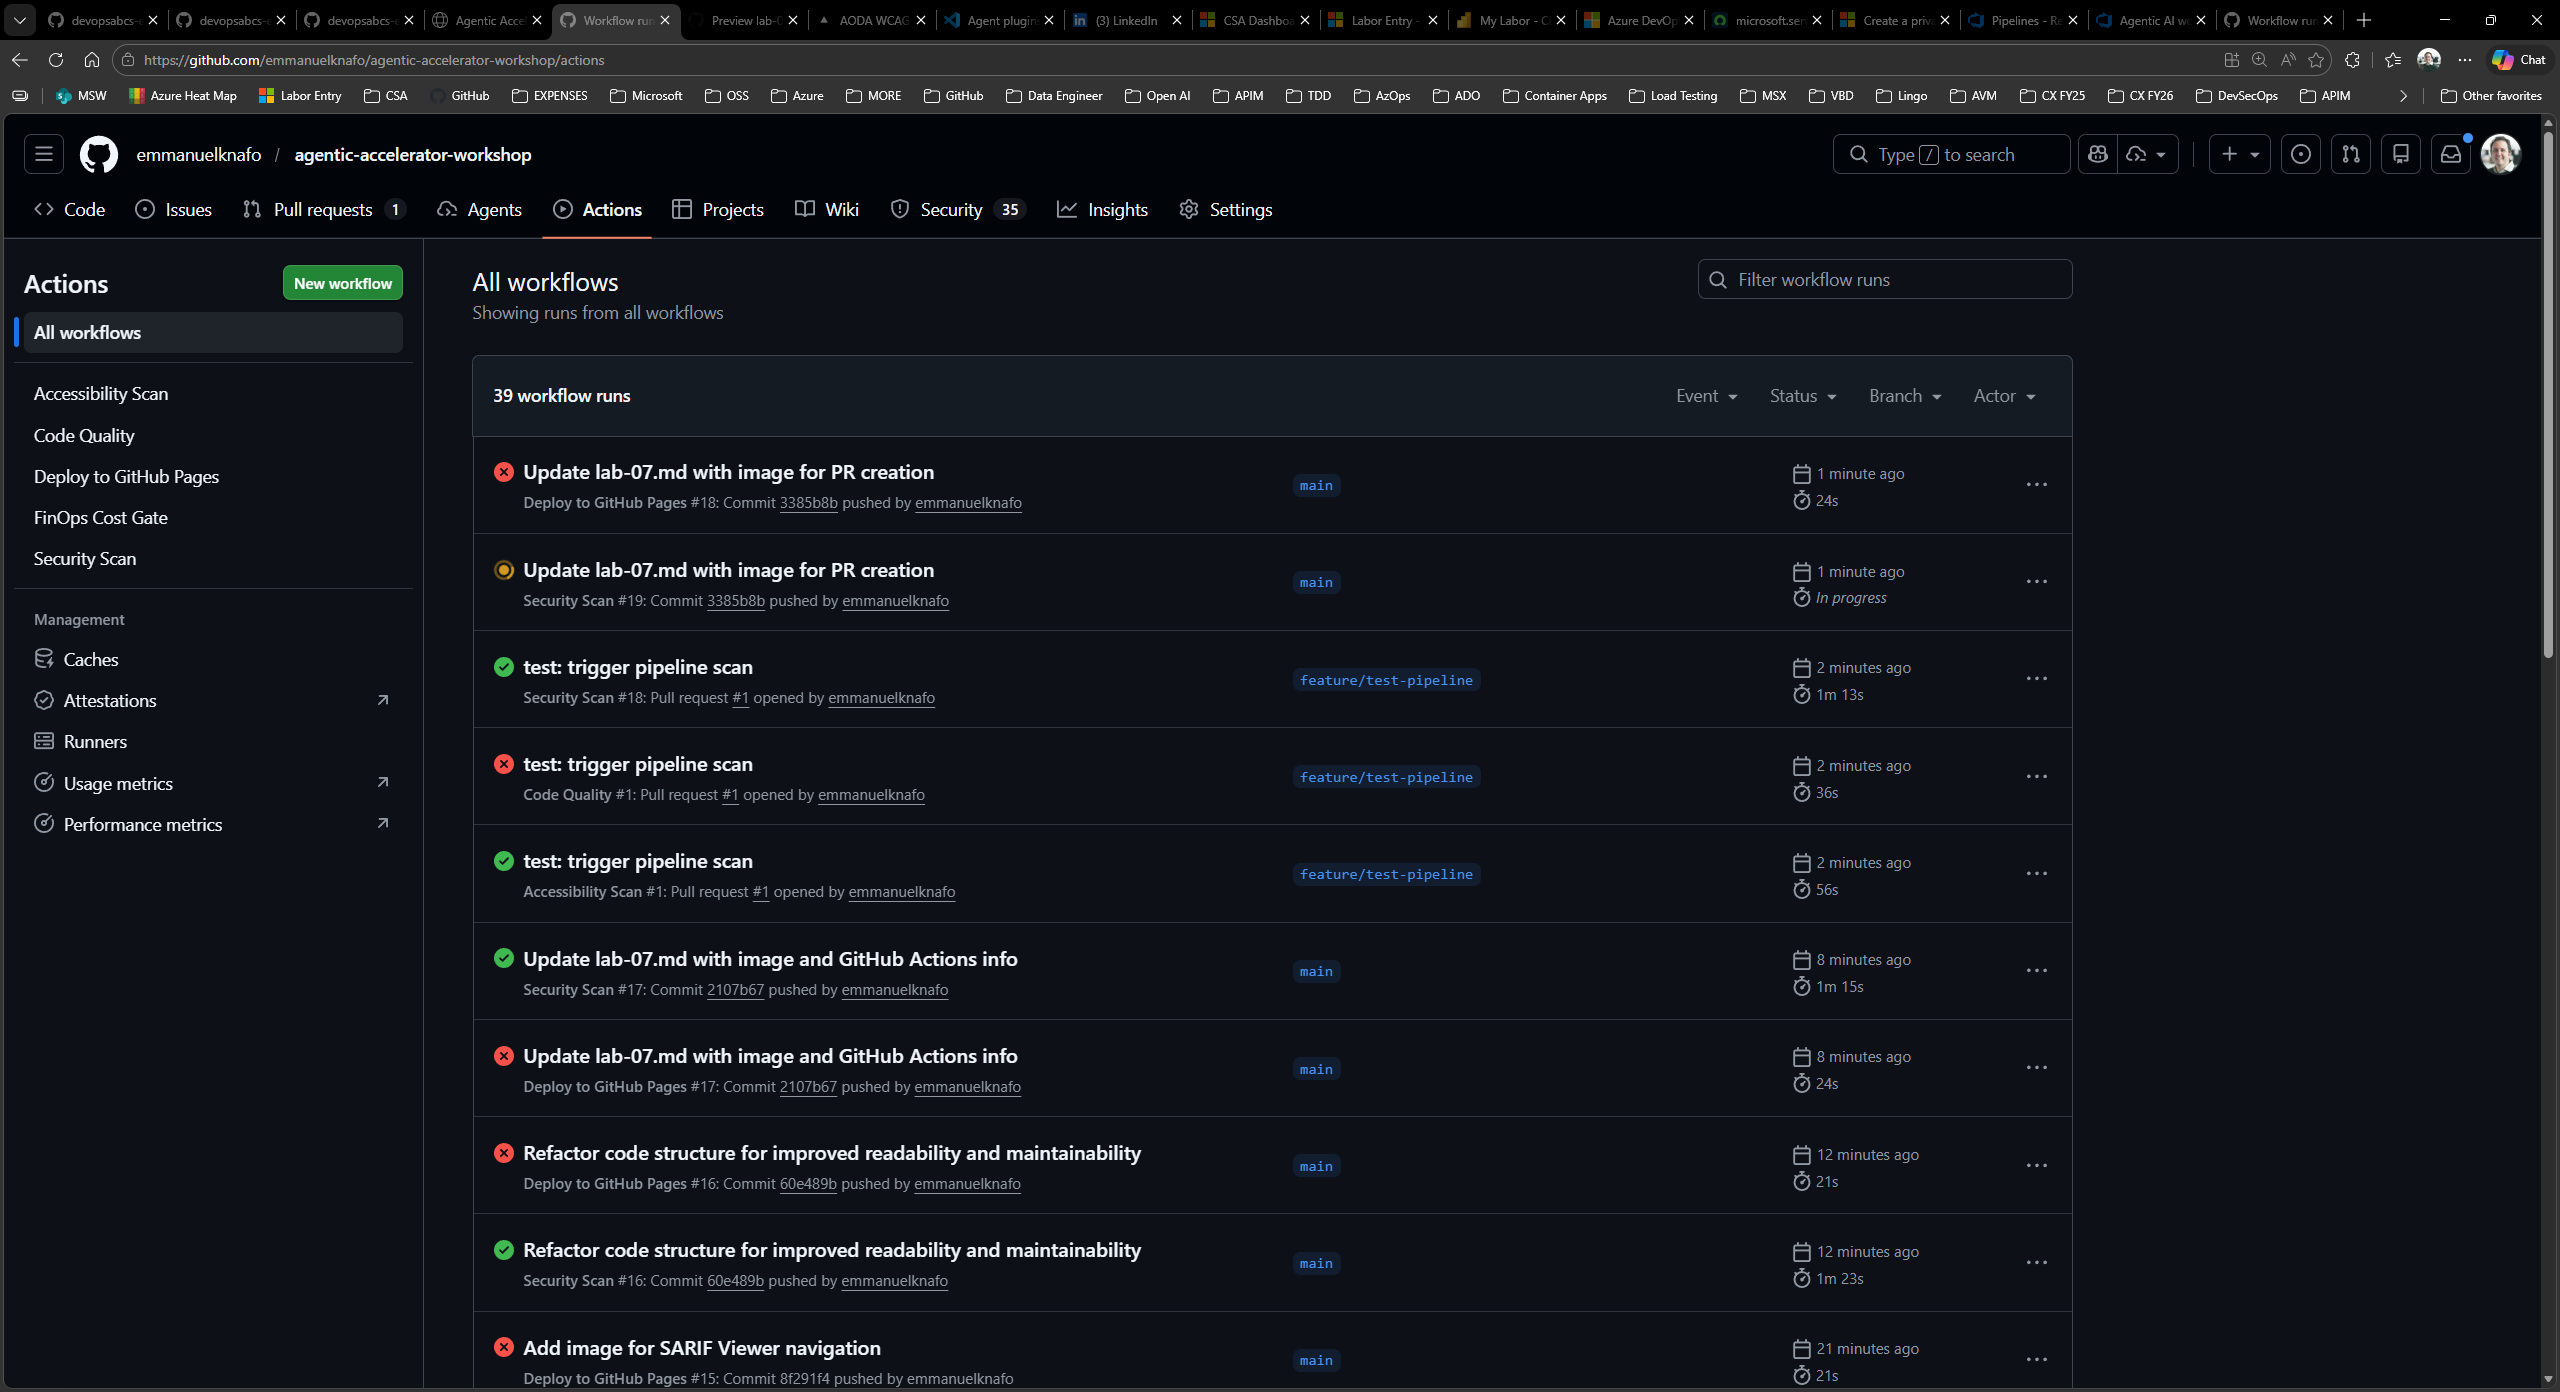
- Click a running workflow to view its details. You will see each job listed with its current status (queued, in progress, or completed).
-
Click a specific job to expand its step-by-step logs. Look for:
- Checkout and setup steps completing first
- Scanning tools executing and producing output
- SARIF upload steps sending results to the Security tab
- Wait for all workflows to complete. Green checkmarks indicate successful completion. If a workflow fails, click it to review the error logs.
[!IMPORTANT] Do not merge or close this pull request yet. Lab 08 requires the workflow results to be available in the Security tab.
Verification Checkpoint
Before proceeding, verify:
- You reviewed the structure of
security-scan.ymland identified trigger events, jobs, and the SARIF upload step - GitHub Actions is enabled with “Allow all actions” and “Read and write permissions”
- You created a branch, pushed a change, and opened a pull request targeting
main - At least two workflows were triggered by the pull request
- You can navigate to the Actions tab and view workflow logs
Next Steps
Proceed to Lab 08 to explore the uploaded SARIF results in the GitHub Security tab.