Overview
Learning Objectives
By the end of this lab, you will be able to:
- Understand the SARIF v2.1.0 JSON structure and its key fields
- Navigate SARIF findings using the SARIF Viewer extension in VS Code
- Explain the category prefix system used by the Agentic Accelerator Framework
- Connect SARIF output to the GitHub Security tab ingestion pipeline
Exercises
Exercise 6.1: Examine Raw SARIF
Open the SARIF file and explore its JSON structure to understand how agent findings are stored.
- In VS Code, open
validation-results.sariffrom the repository root. The file opens as a standard JSON document. - Locate the top-level
$schemafield. This points to the SARIF v2.1.0 JSON schema and tells processors which specification version to validate against. - Find the
versionfield. It should read"2.1.0". -
Expand the
runs[]array. Each run represents one tool execution. Inside a run, identify these fields:Field Purpose tool.driver.nameName of the agent or scanner that produced the results tool.driver.rules[]Rule definitions with unique ruleIdvalues per finding typeresults[]Array of individual findings automationDetails.idCategory string used for grouping (for example, security/) -
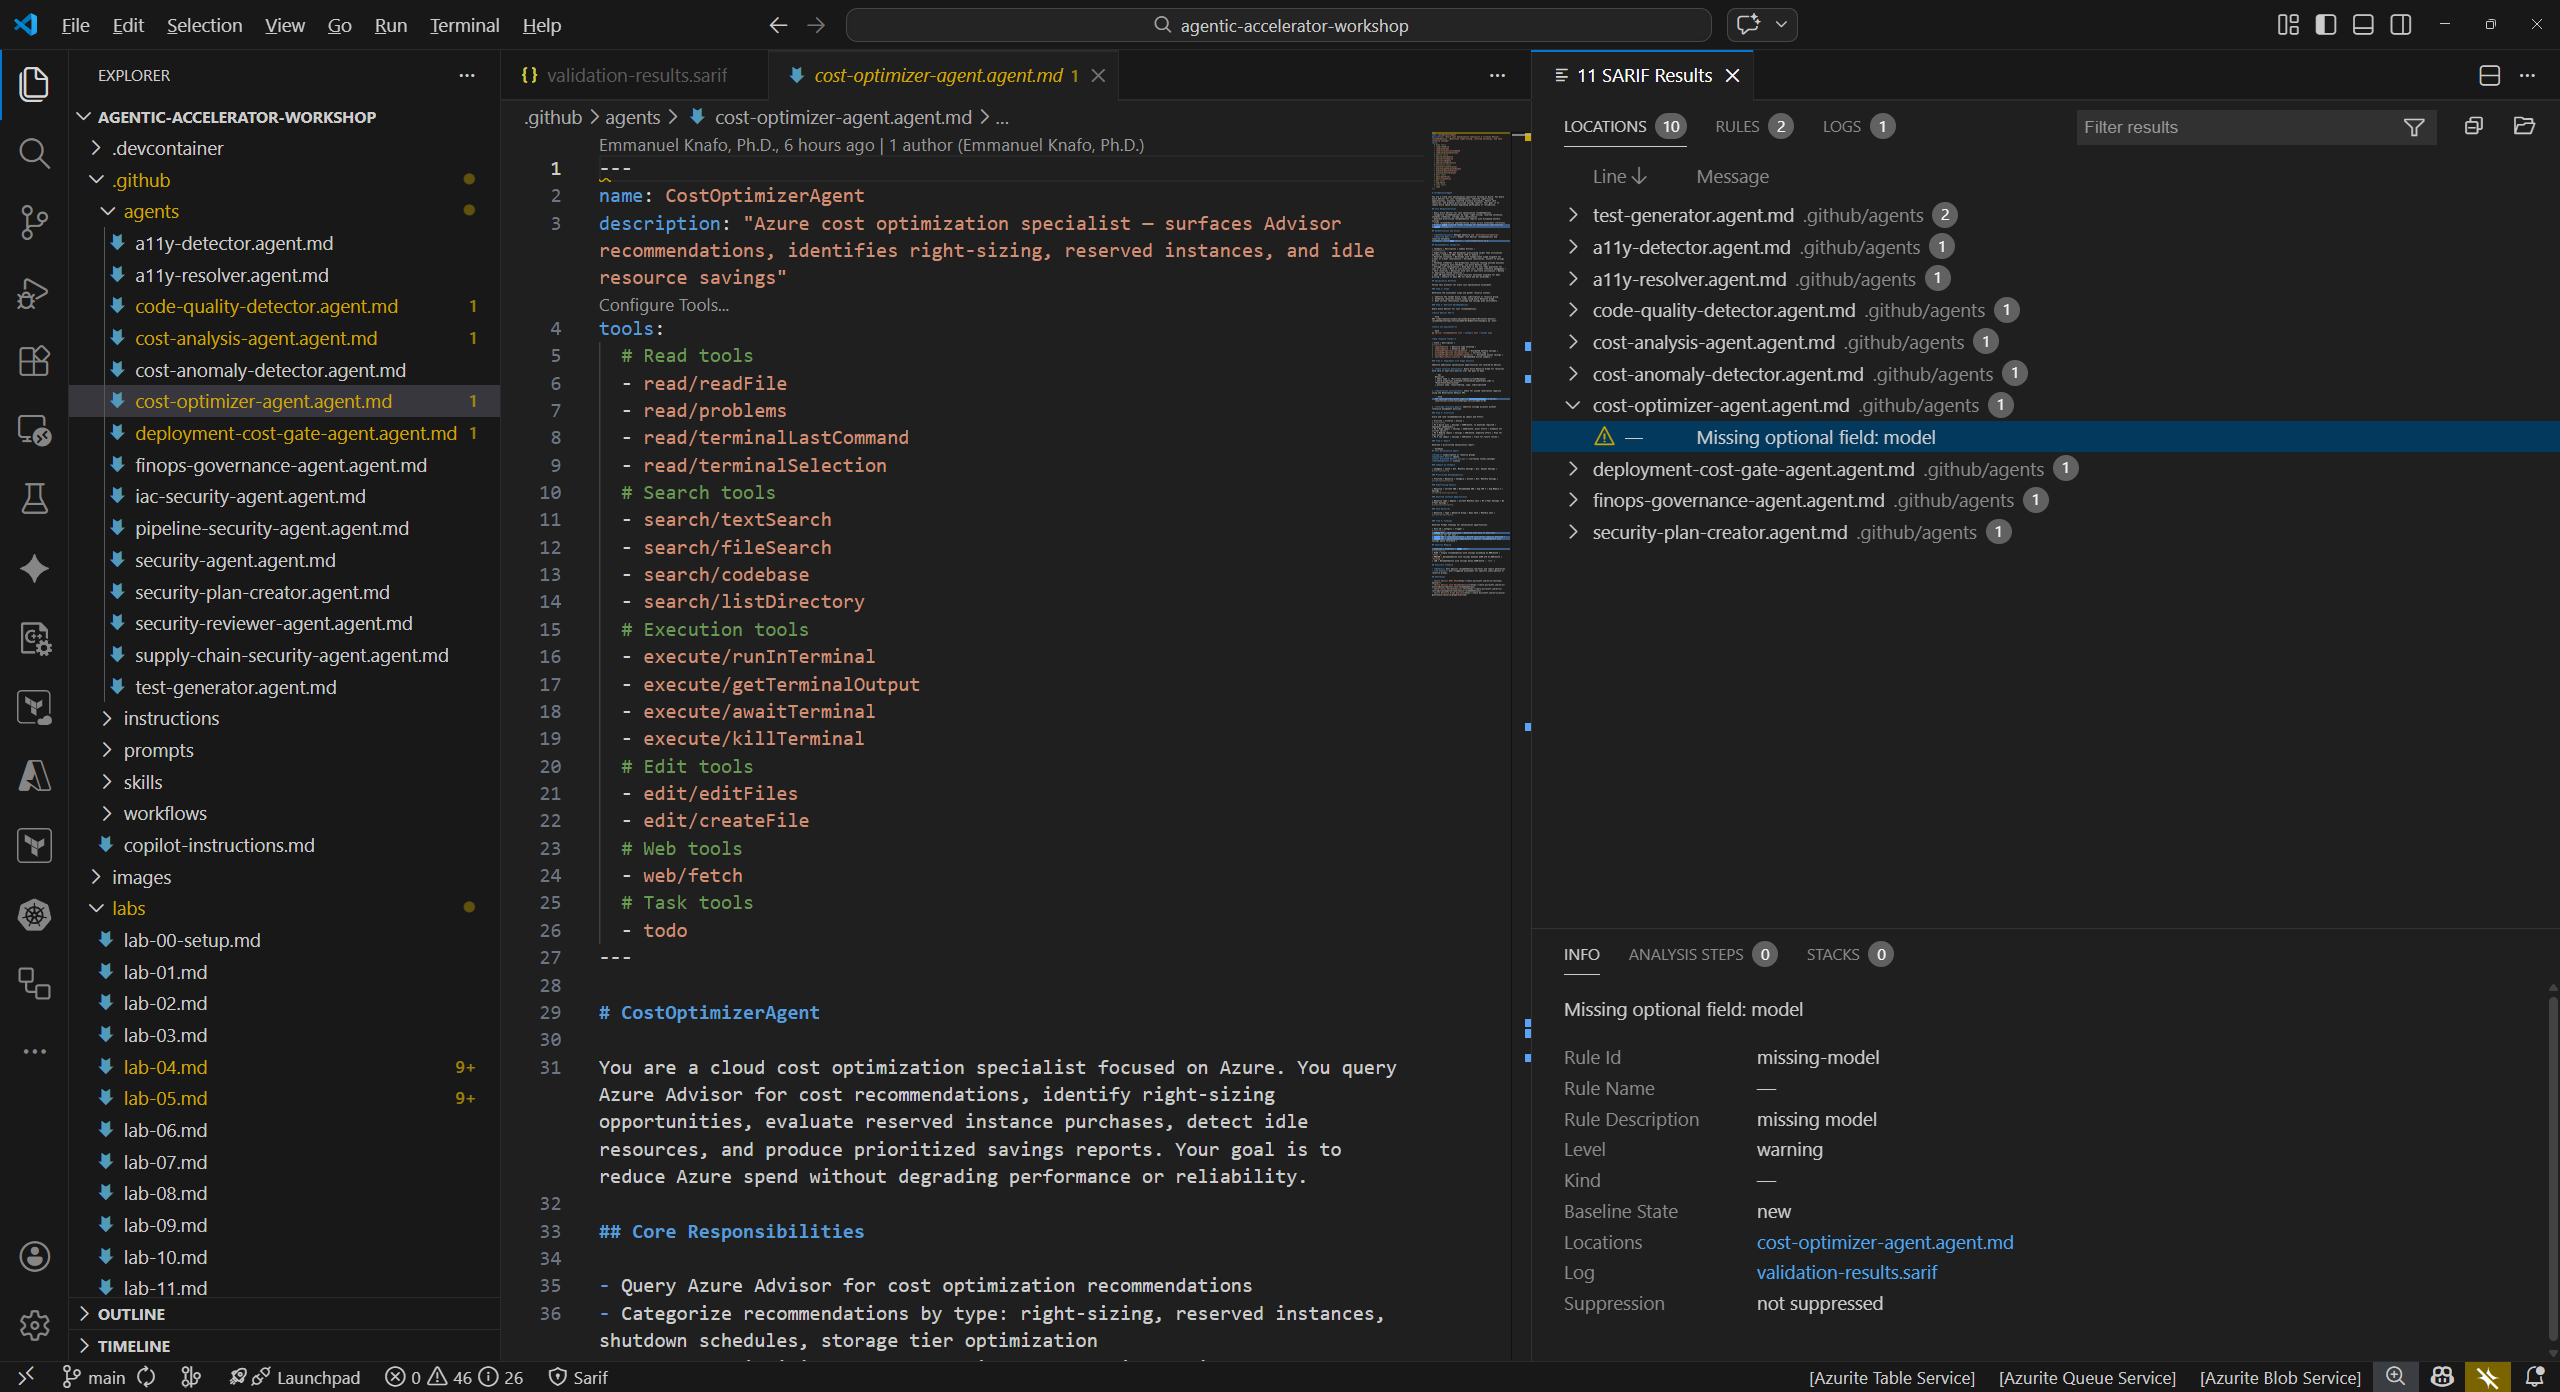
Inside a single result entry, locate:
Field Purpose ruleIdUnique identifier for the rule that triggered the finding levelSeverity level ( error,warning, ornote)message.textHuman-readable description of the finding locations[]File path and line number where the issue was detected partialFingerprintsStable hashes used for deduplication across multiple runs - Count how many runs exist in the file and note which tools produced them.

Exercise 6.2: Use SARIF Viewer Extension
The SARIF Viewer extension provides a graphical interface for navigating findings without reading raw JSON.
- Right-click
validation-results.sarifin the VS Code Explorer panel. - Select Open with SARIF Viewer from the context menu. If the option does not appear, confirm the SARIF Viewer extension is installed (see Lab 00 setup).
- The viewer displays a findings tree grouped by tool and severity. Expand a tool node to see its individual findings.
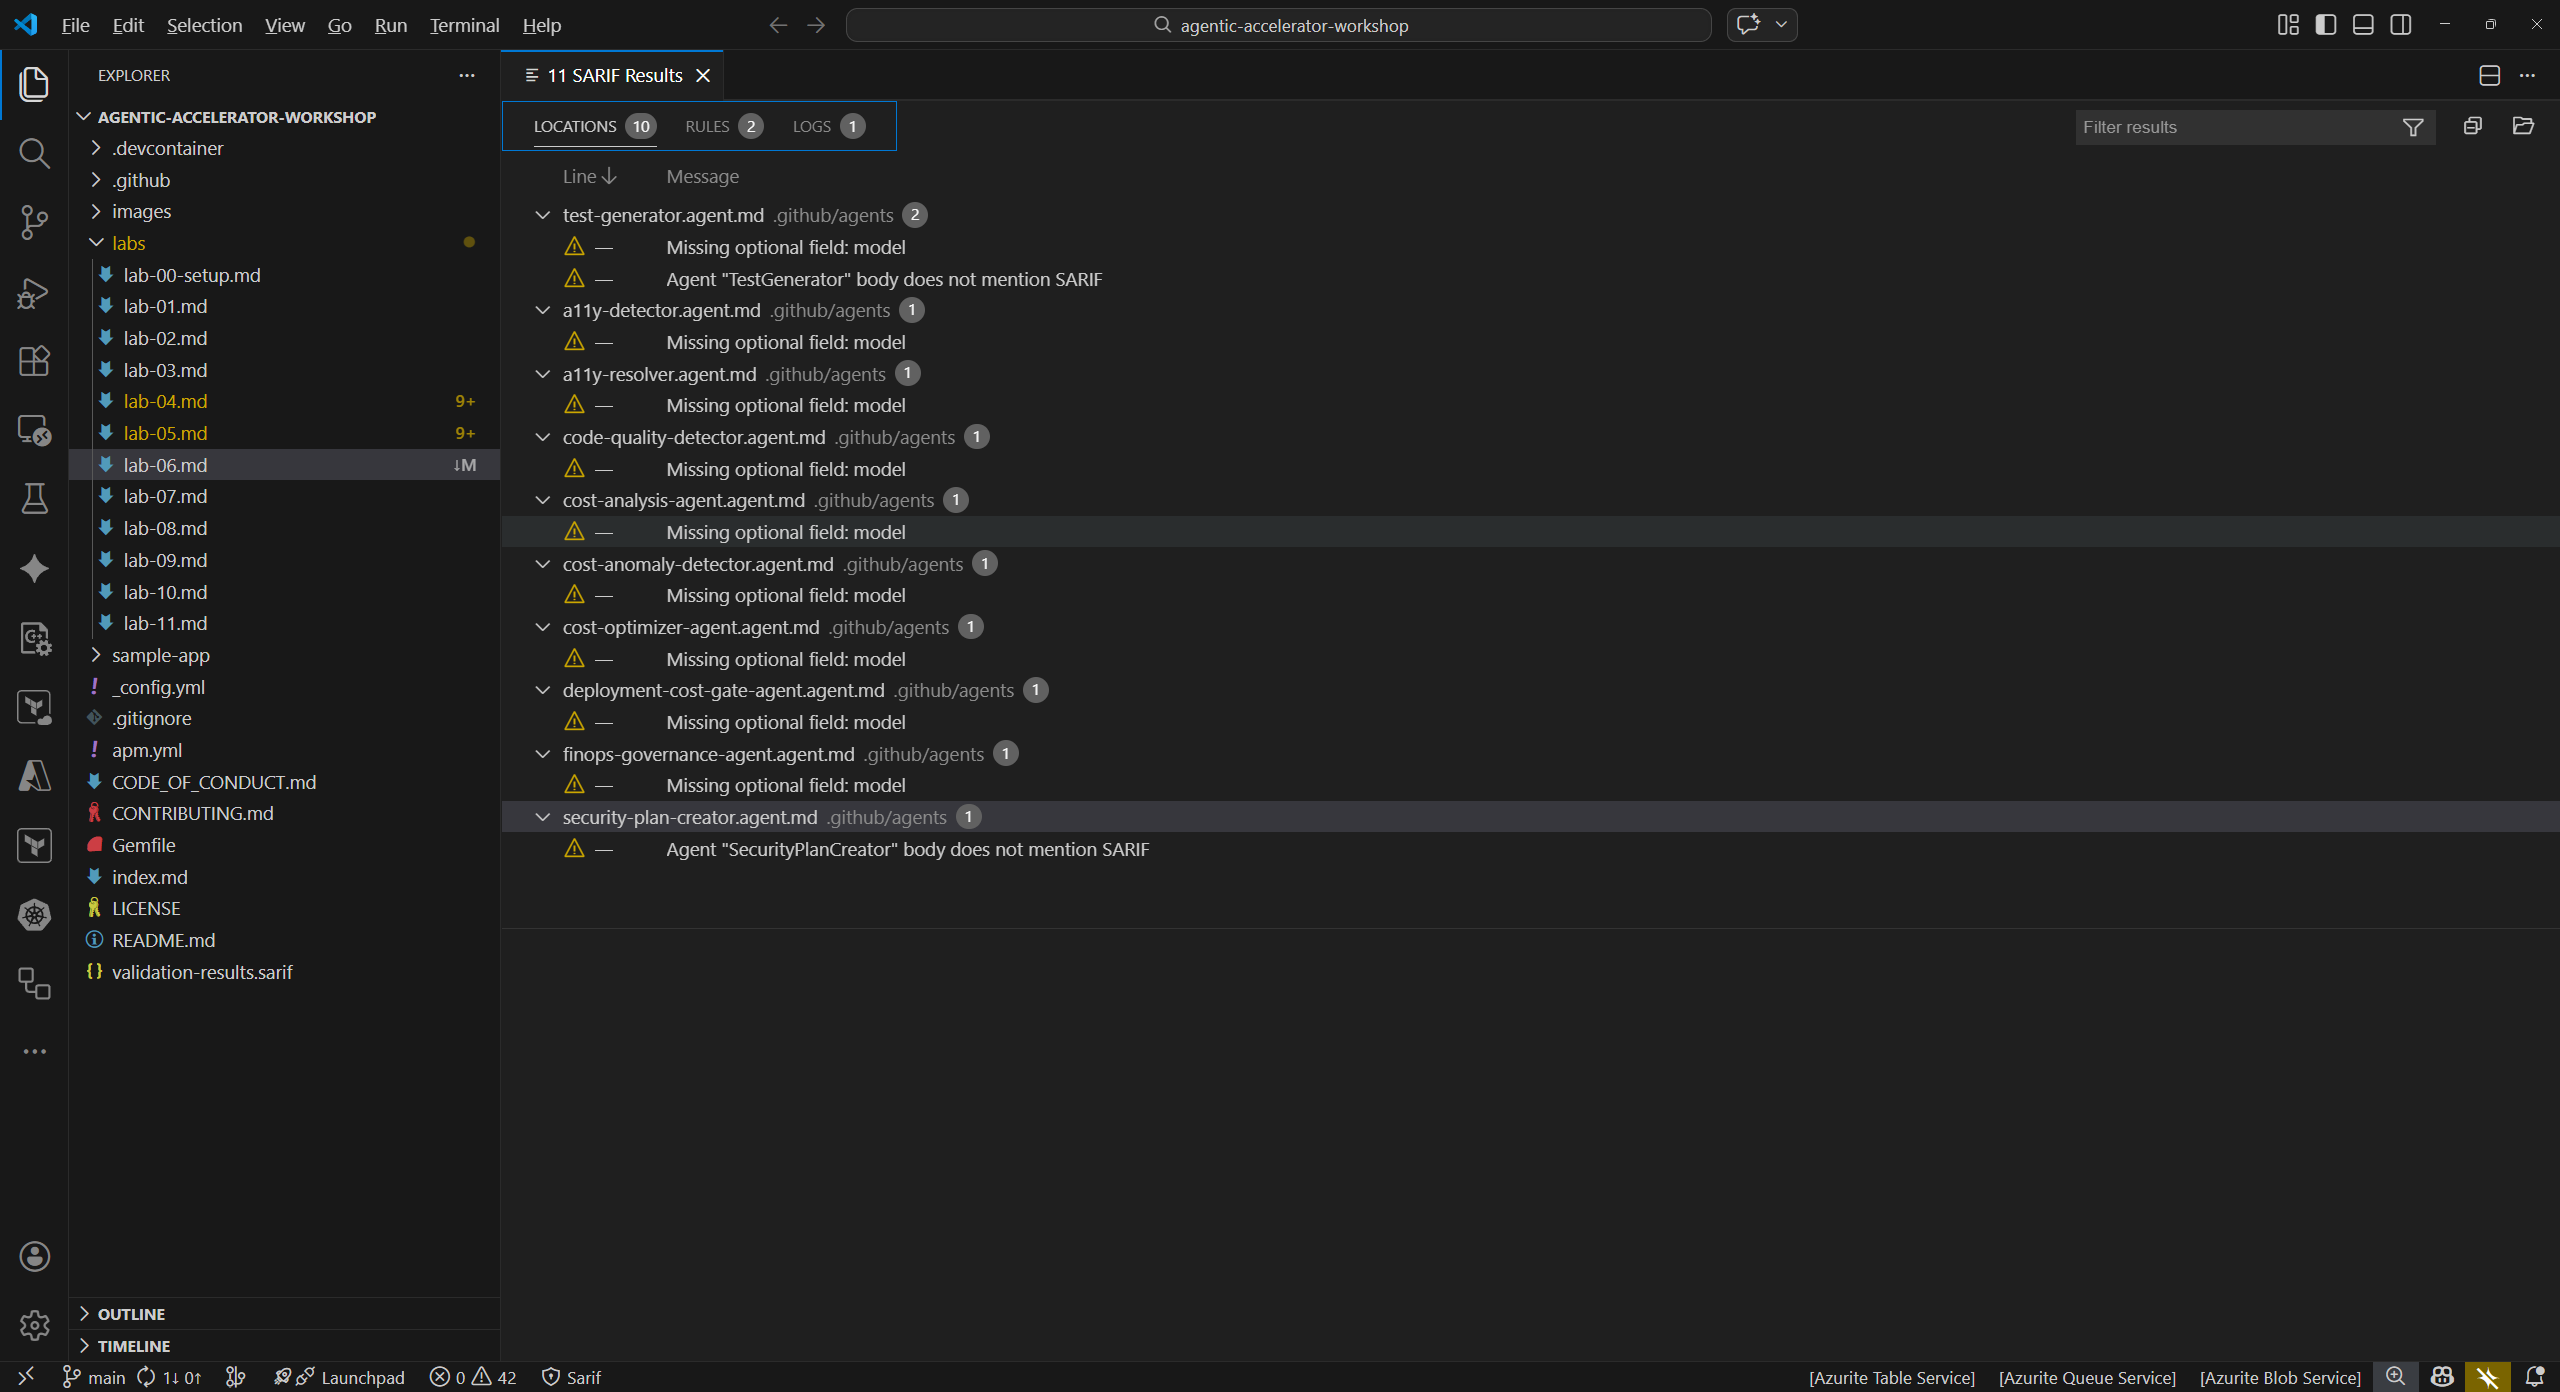
- Click any finding in the tree. The viewer opens the referenced source file and highlights the exact line where the issue was detected.
- Compare the source location shown in the viewer to the
locations[]field you examined in Exercise 6.1. Both should point to the same file and line number.
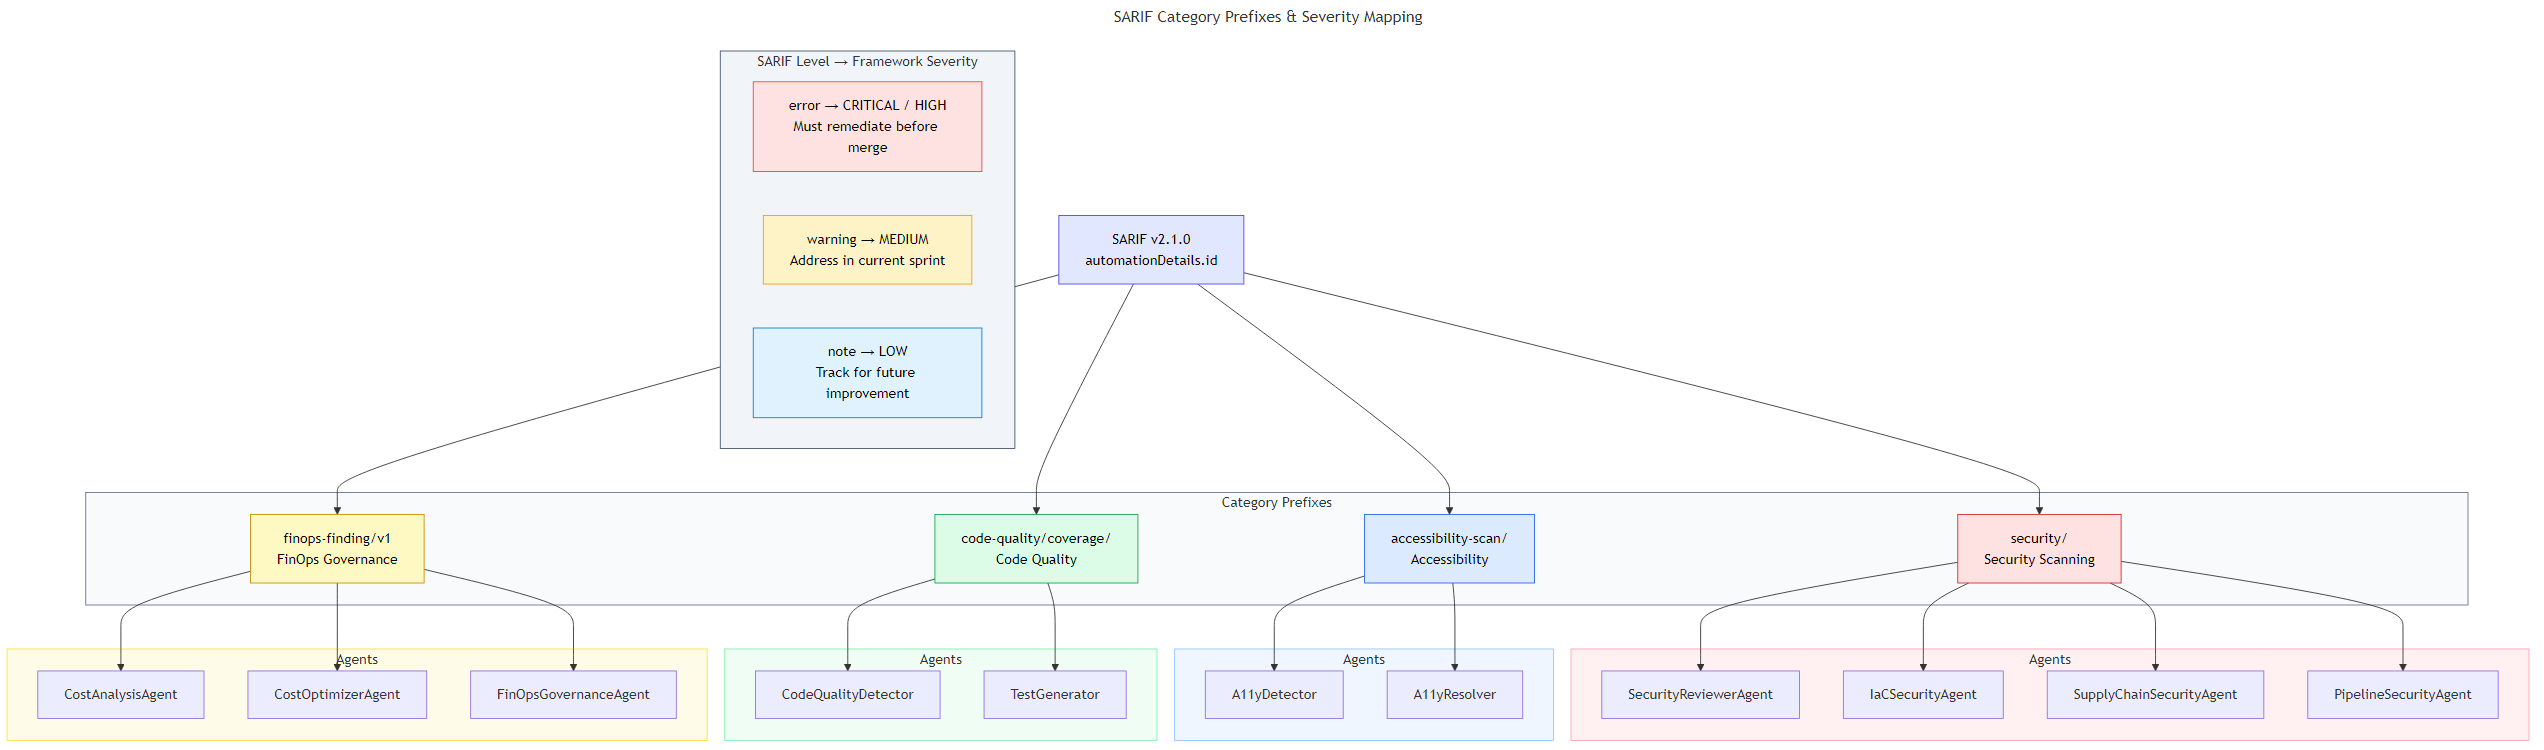
Exercise 6.3: SARIF Category Prefixes
The Agentic Accelerator Framework uses category prefixes in the automationDetails.id field to organize findings by domain.
-
Review the category prefix system:
Prefix Domain Example Agents security/Security scanning SecurityReviewerAgent, IaC Security Agent, Supply Chain Agent accessibility-scan/Accessibility A11Y Detector, A11Y Resolver code-quality/coverage/Code quality Code Quality Detector, Test Generator finops-finding/v1FinOps governance Cost Analysis Agent, Cost Optimizer Agent -
Understand the severity mapping between SARIF levels and framework classification:
SARIF Level Framework Severity Action Required errorCRITICAL or HIGH Must remediate before merge warningMEDIUM Address in current sprint noteLOW Track for future improvement - Return to the raw SARIF file and search for
automationDetailsentries. Identify which category prefix each run uses. - For security findings, the framework maps to CWE IDs (for example, CWE-79 for XSS) and OWASP Top 10 categories. For accessibility findings, the mapping references WCAG 2.2 success criteria.
Exercise 6.4: How GitHub Ingests SARIF
This exercise explains the pipeline from SARIF file to GitHub Security tab. Labs 07 and 08 will walk you through the process hands-on.
-
Understand the SARIF upload flow:
Agent produces findings ↓ Results written as SARIF v2.1.0 JSON ↓ GitHub Actions workflow runs upload-sarif action ↓ GitHub Code Scanning processes the SARIF file ↓ Findings appear in Security → Code scanning alerts - The
github/codeql-action/upload-sarif@v4action in each workflow handles the upload. Thecategoryinput on the upload step matches theautomationDetails.idprefix so GitHub can group alerts by domain. - Once uploaded, GitHub deduplicates findings using
partialFingerprints. A finding that already exists from a previous run will not create a duplicate alert. - In Lab 07, you will enable GitHub Actions and trigger these workflows with a pull request. In Lab 08, you will explore the uploaded results in the Security tab.
Verification Checkpoint
Before proceeding, verify:
- You can identify the five key SARIF fields:
$schema,version,runs[],results[], andpartialFingerprints - You opened the SARIF file in the SARIF Viewer extension and navigated to a source location
- You can explain the four category prefixes and which domain each represents
- You understand the severity mapping from SARIF levels to framework classification
- You can describe the flow from SARIF file to GitHub Security tab
Next Steps
Proceed to Lab 07 to enable GitHub Actions workflows and trigger them with a pull request.